Instant Pot Chicken Biryani: Step-by-Step Recipe


Do you put off the idea of making biryani just because you think it is a long and tiring process? Well, I’ve got some good news for you. You can cook biryani that tastes like heaven within 30 minutes. I know it sounds impossible, but thanks to the instant pot and a few tweaks here and there within the traditional biryani recipe, you can actually make it happen. So are you ready to experience this fragrant biryani, infused with authentic Indian spices to take you on a rollercoaster ride of flavors? Fasten your seatbelts and switch on your instant pot, we are making this instant pot chicken biryani!

If there is one recipe that every South Asian person knows by just smelling it blindfolded, it has to be biryani. It has a distinct flavor and aroma, and although there are many different biryani recipes, they all smell like heaven thanks to exotic and aromatic spice mixes. Biryani is a very versatile dish and has been widely adopted. It is now a popular dish all over South Asia and the world, with focal areas of popularity in Pakistan, India, Bangladesh, Sri Lanka, Nepal, and even Burma. This is one of the reasons why this recipe is so versatile; every region and home has adapted it according to their own tastes. This instant pot chicken biryani is one of the relatively simpler and easier biryani recipes, which makes it a great option for beginners to try. So follow this step-by-step recipe, to make this quick and delicious instant pot chicken biryani.
Ingredients For Instant Pot Chicken Biryani
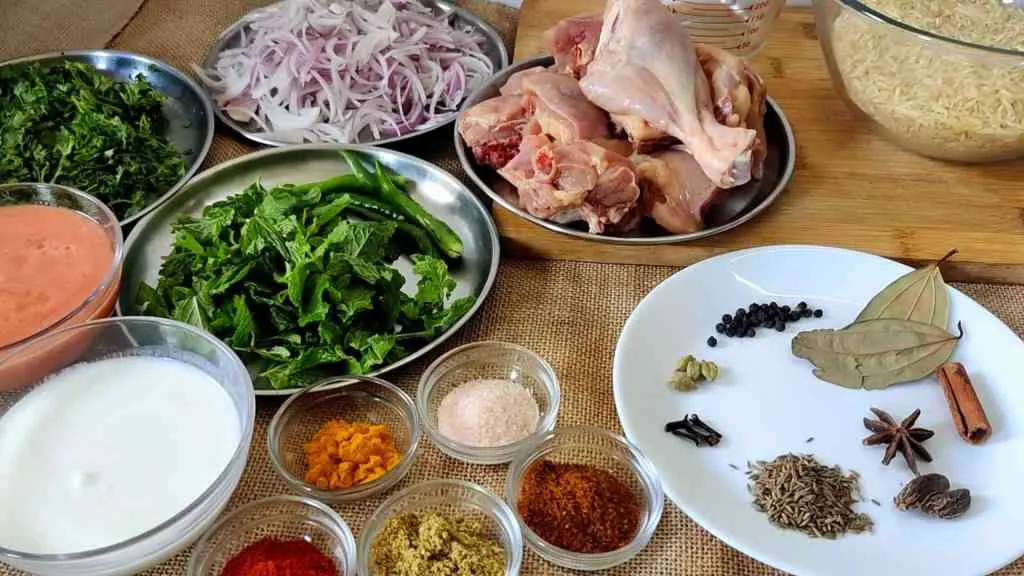
Rice
Rice is the main ingredient in Biryani, and the use of long-grain Basmati rice adds a distinct aroma and flavor to the dish. The rice contributes to the texture of the biryani by giving it a light, fluffy, and separate grain structure.
Chicken
The chicken provides the protein in the Biryani and adds to the flavor and texture of the dish. The tender chicken pieces cooked in aromatic spices, ghee, and yogurt create a juicy and flavorful dish.
Water
The water is used to cook the rice and chicken and provides moisture to the dish.
Ghee
Ghee is used to sauté the onions and whole garam masala, adding a rich flavor and aroma to the dish.
Whole Garam Masala
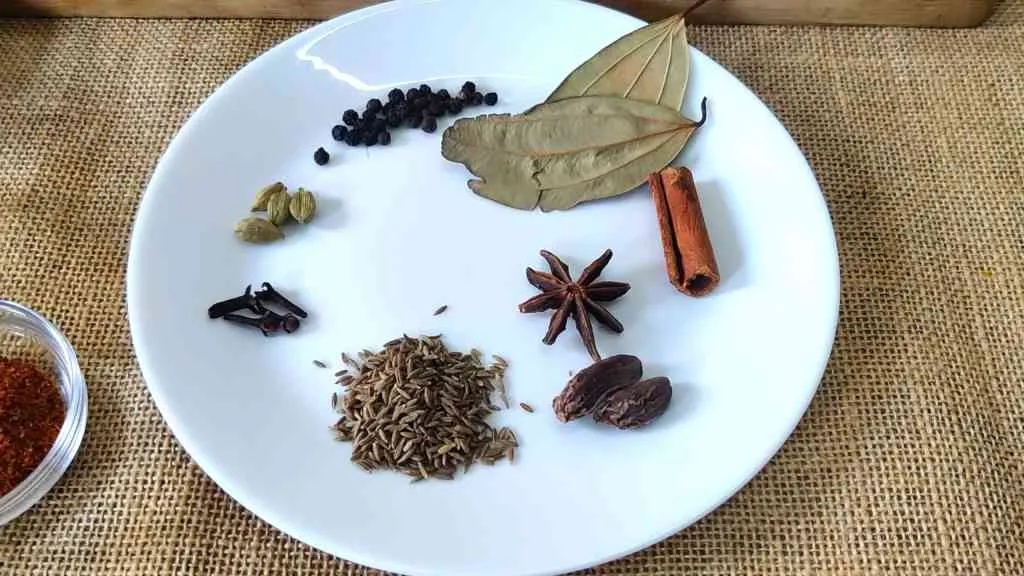
It is a blend of whole spices used to add flavor and aroma to Indian dishes like Biryani. The recipe includes cumin seeds, black peppercorns, cardamom pods (both green and black), cloves, cinnamon, star anise, and bay leaves. The spices are added whole to the dish and removed before serving, infusing their flavors into the dish without overpowering it.
Onions
The onions are sautéed in ghee and whole garam masala, adding sweetness and a deep, rich flavor to the dish. The caramelized onions also add texture and color to the Biryani.
Ginger Garlic Paste
The ginger garlic paste adds a pungent, spicy, and slightly sweet flavor to the dish. It also contributes to the aroma of the Biryani.
Spices
The combination of spices used in the Biryani adds a complex, well-rounded flavor to the dish. Turmeric adds a vibrant yellow color to the Biryani, while red chili powder provides heat. Coriander powder adds a slightly citrusy and earthy flavor, while garam masala powder adds depth and complexity to the dish. Salt is also important as it enhances the overall flavor of the Biryani.
Fresh coriander, mint leaves, and Green Chilies
Fresh coriander and mint leaves garnish the Biryani and add a refreshing and aromatic flavor to the dish. On the other hand, green chilies add heat to the Biryani, balancing the sweetness of caramelized onions and adding a fresh and slightly fruity flavor to the dish.
Yogurt
Yogurt helps tenderize the chicken and adds a creamy and tangy flavor to the Biryani. The yogurt also balances the heat from the spices and green chilies.
Tomato Puree
Tomato puree adds a sweet and slightly acidic flavor to the Biryani. The tomato puree also contributes to the vibrant red color of the dish.
Ghee
Ghee adds richness, nuttiness, and a sweet aroma to the Biryani. The use of ghee also contributes to the overall flavor and texture of the dish.
Step By Step Recipe For Instant Pot Chicken Biryani
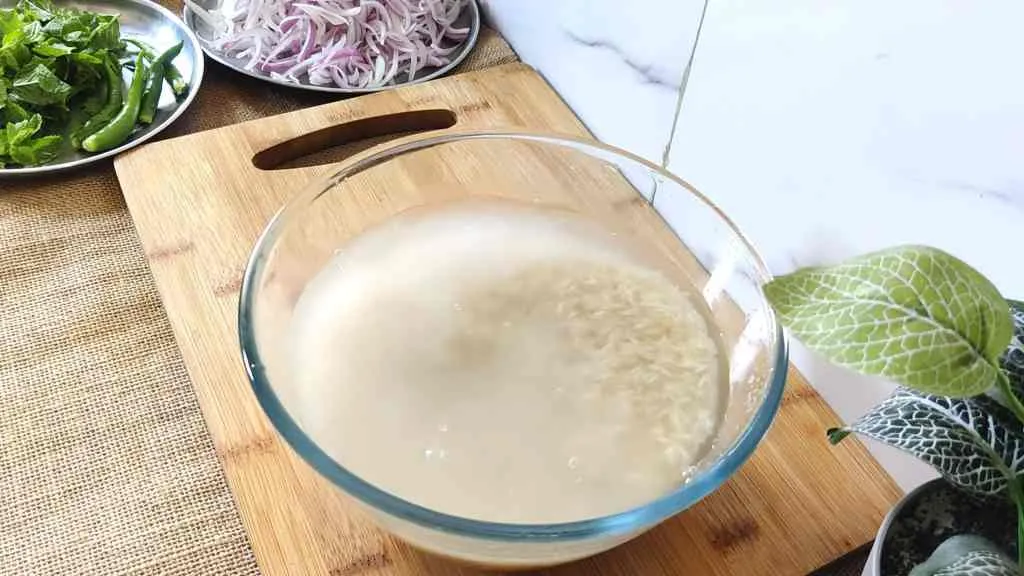
To begin, wash the rice in water until the water runs clear. Then, soak the rice in water for 20 minutes. Set aside.
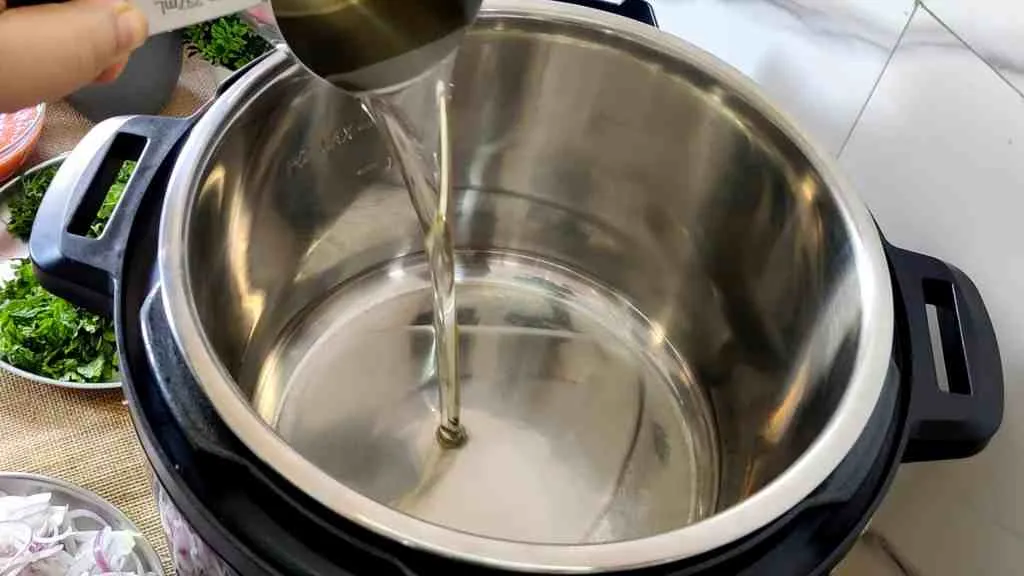
Next, turn on the Instant Pot and select saute mode. Heat 1/4 cup ghee in the pot.
Once the ghee is hot, add whole garam masala to the pot and fry for a few seconds until it starts to release its aroma.
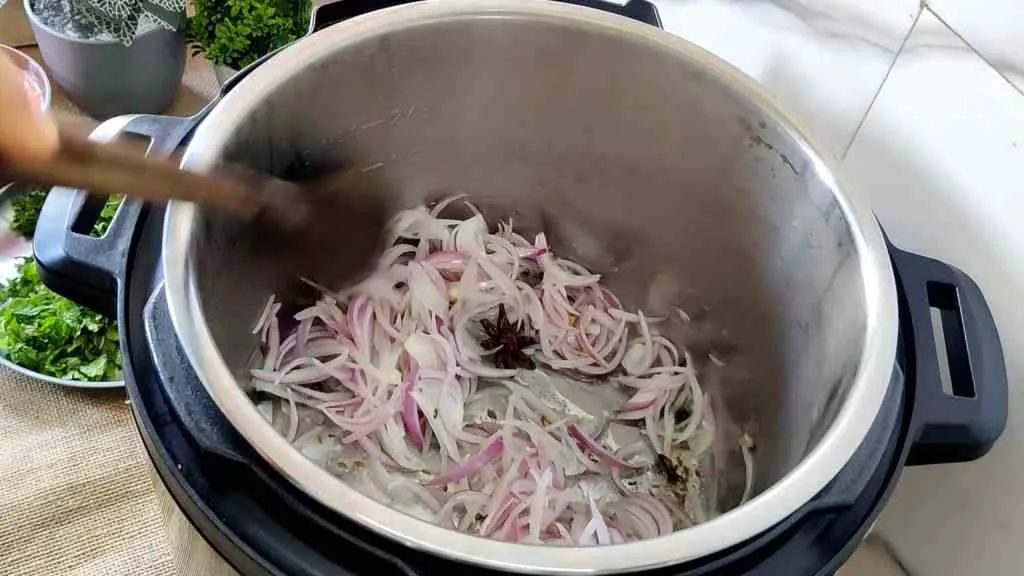
Then, add sliced onion to the pot and fry until golden brown.
After that, add ginger garlic paste and fry for a minute or until the raw smell goes away.

Add chicken pieces to the pot and fry for a few seconds until they are lightly browned.

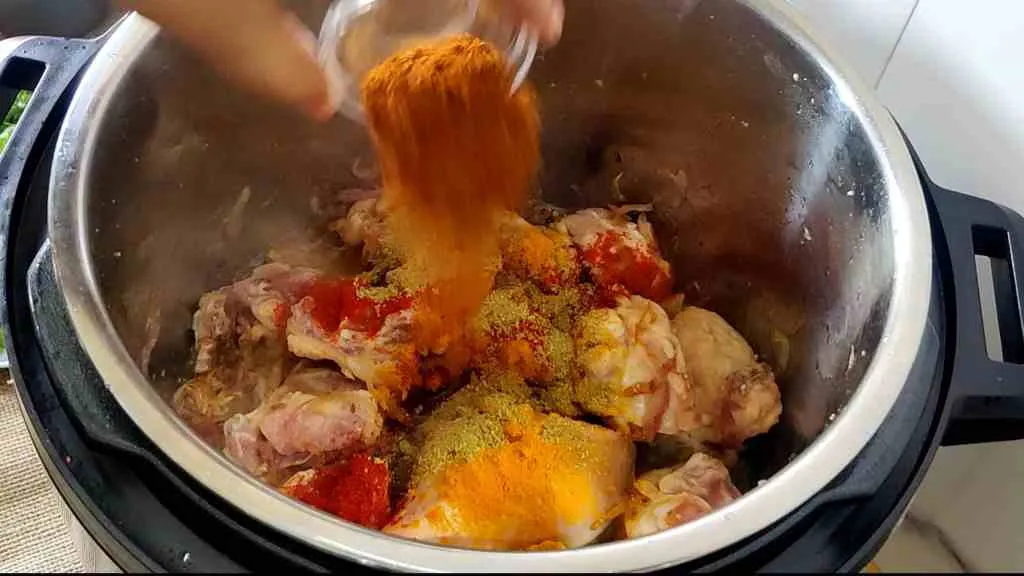
Next, add turmeric powder, red chili powder, coriander powder, garam masala powder, and salt to the pot. Stir well.
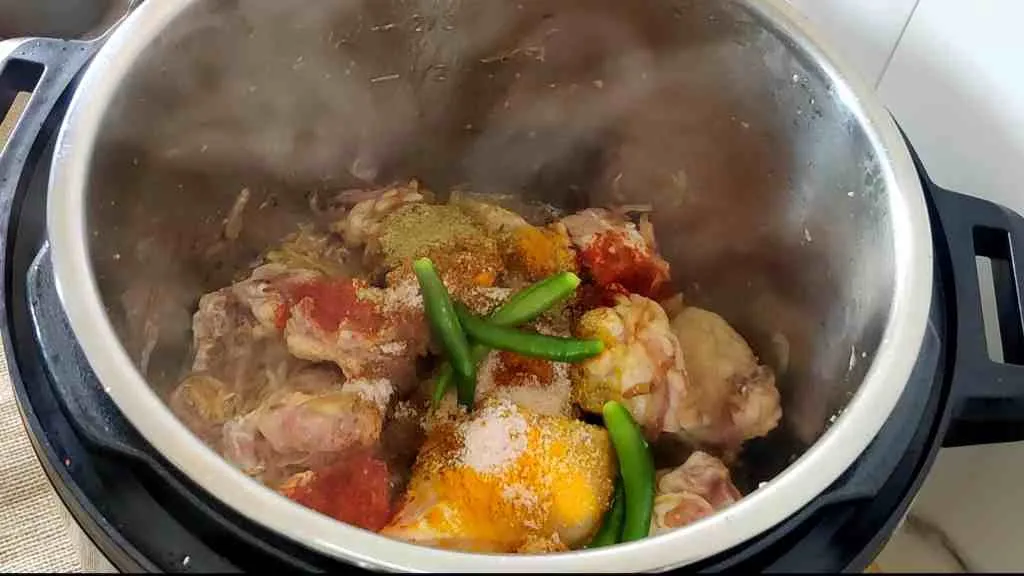
Then, add slit green chilies and fry everything together until the chicken is nicely coated with the spices and starts to release its fragrance.
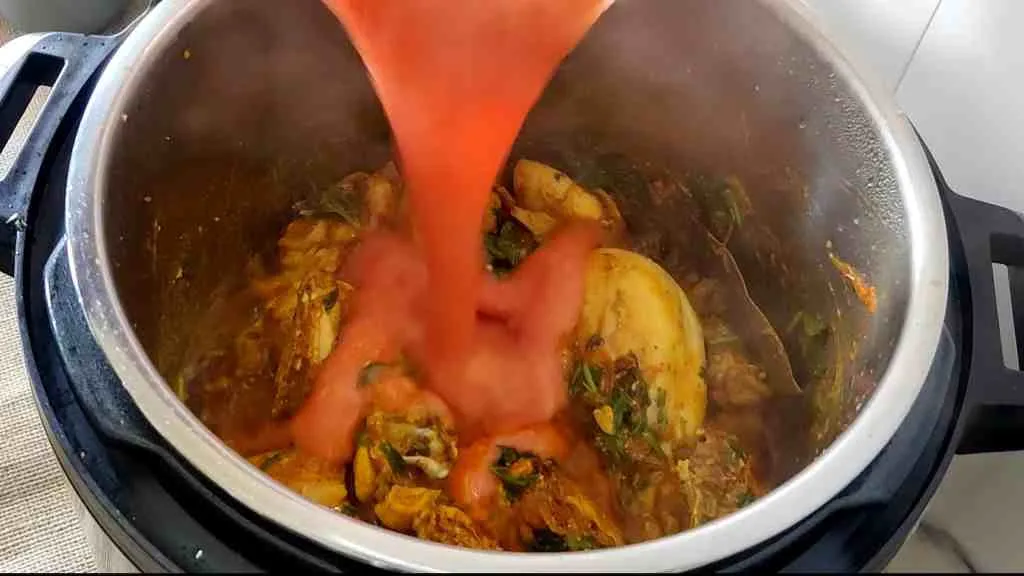
After that, add chopped fresh coriander and mint leaves, yogurt, and tomato puree to the pot. Stir everything together.
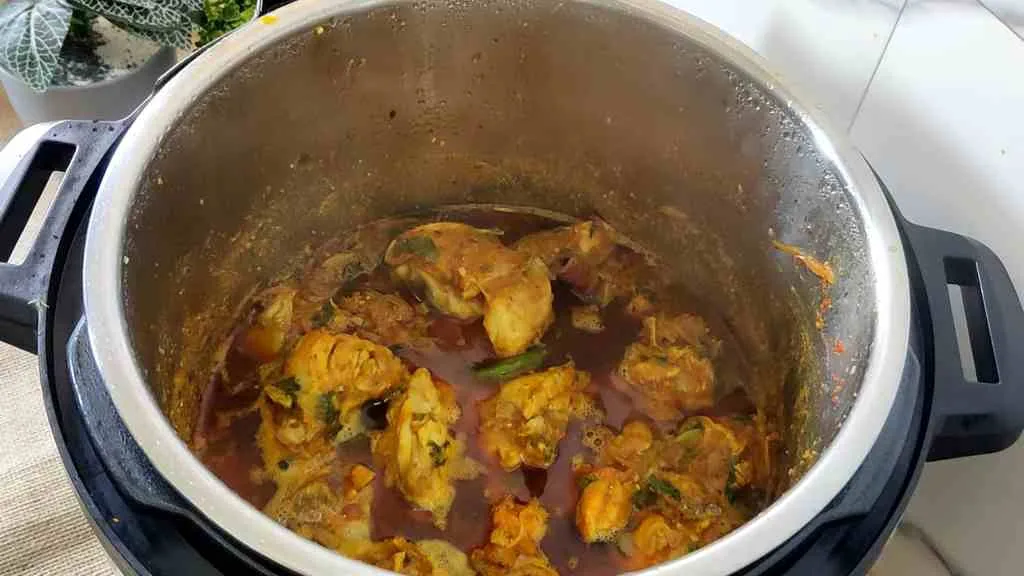
Once everything is well mixed, cancel the saute mode. Close the Instant Pot lid and turn on high pressure mode for 3 minutes.

After 3 minutes, do a quick pressure release.

Open the lid and check the consistency of the gravy. If it’s too thick, add some water. It should be of a gravy-like consistency.
Now, add soaked rice and 1 cup water to the pot, making sure all the rice is under the liquid.
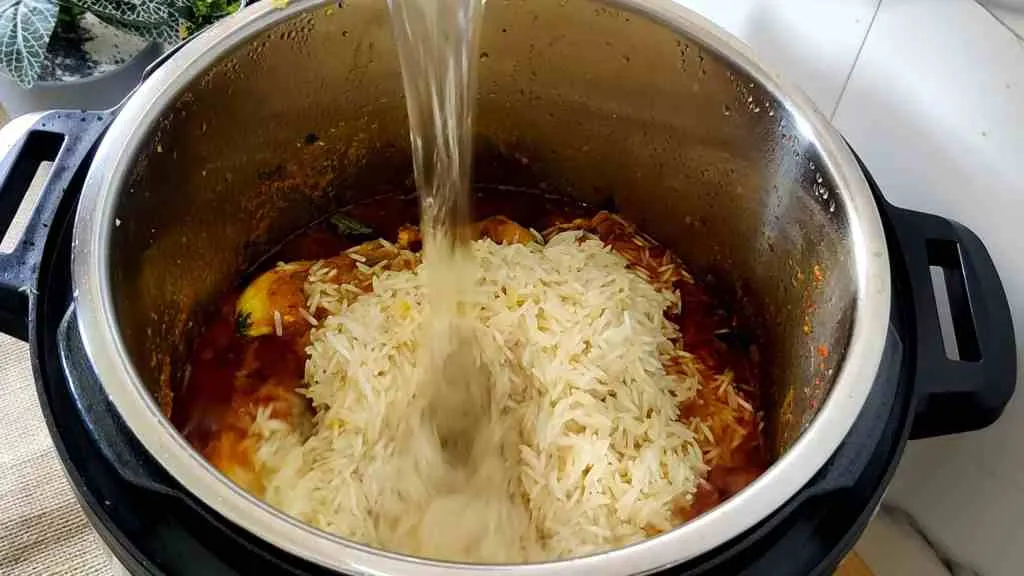
Close the lid and turn on high pressure mode for 5 minutes.

Once the cooking is complete, let the pressure release naturally for 5 minutes.

Open the lid and add ghee, fresh coriander leaves, and mint leaves to the pot. Fluff the biryani with a fork.
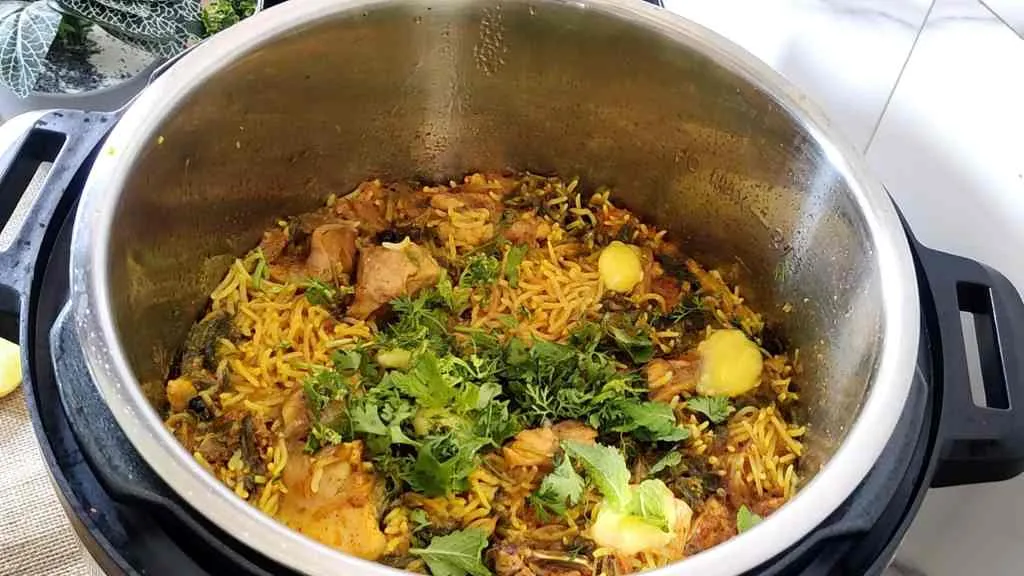
Finally, serve the biryani hot with raita or your favorite side dish. Enjoy!

Serving Suggestions

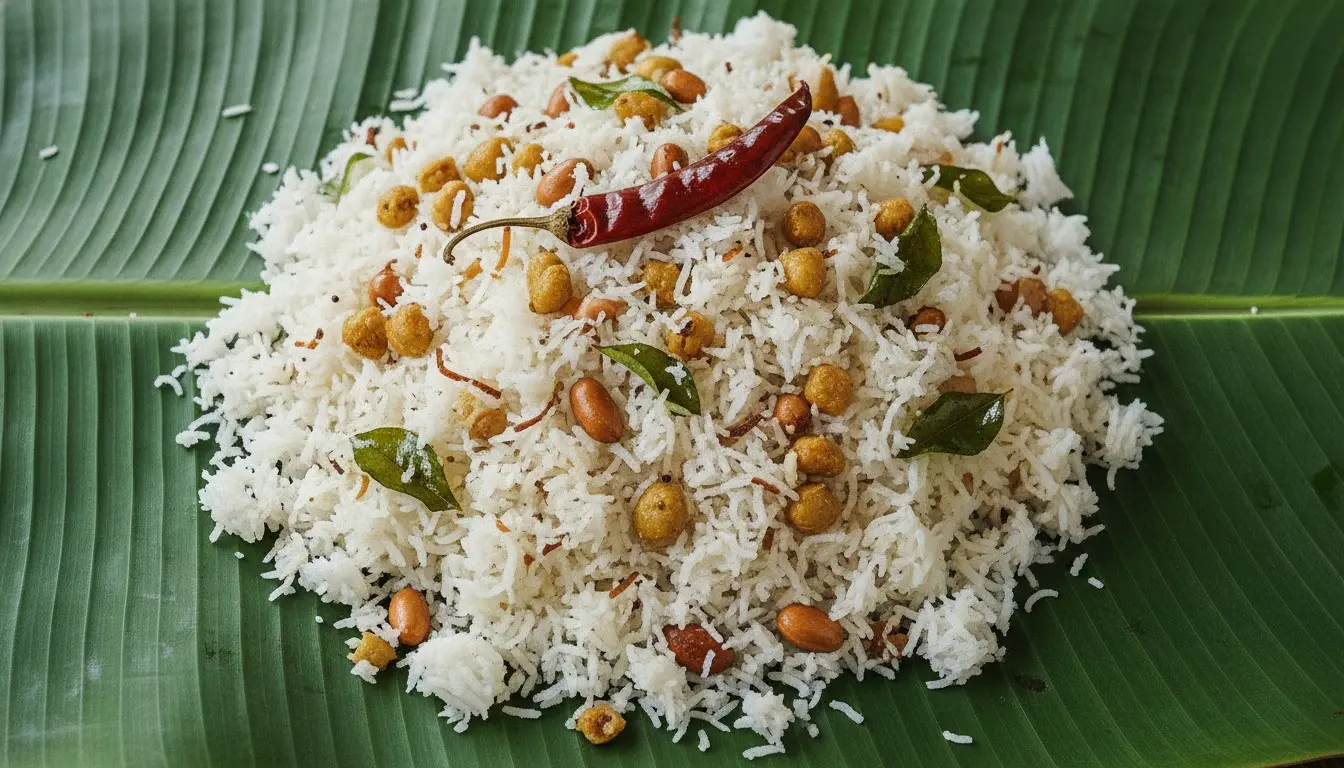
When it comes to serving biryani, there are plenty of options to choose from. To begin with, serve the biryani hot in individual plates or bowls, garnished with some fresh coriander leaves and mint leaves on top. Additionally, you can add a dollop of plain yogurt or raita on the side of the biryani to balance out the spiciness and add a refreshing touch to the dish. Furthermore, pairing the biryani with some hot and spicy pickle or chutney can give a burst of flavor to the dish. To cool down the heat of the spices, enjoy the biryani with a glass of chilled lassi or buttermilk. For a more elaborate meal, serve some kebabs or tikkas as appetizers before the biryani and end the meal with some sweet dessert like gulab jamun or ras malai.
Storage Suggestions
To begin with, allow the biryani to cool down to room temperature before transferring it to an airtight container. Once the biryani is cool, place it in the refrigerator immediately to prevent the growth of bacteria. You can store it in the refrigerator for up to 3-4 days. However, to ensure the freshness and taste of the dish, it is important to reheat it properly. To use the microwave, transfer a portion of the biryani to a microwave-safe dish and heat it for 2-3 minutes until it is hot. Alternatively, you can reheat the biryani on the stovetop. Transfer the biryani to a pan, add a little water to prevent it from sticking to the bottom, and cover the pan with a lid. However, avoid reheating the biryani more than once, as it can cause the rice to become dry and hard.
FAQs
How can I make biryani without a pressure cooker?
To make biryani without a pressure cooker, you can use a heavy-bottomed pot with a tight-fitting lid. Follow the recipe as usual, and once you’ve added the rice and water, cover the pot tightly and cook on low heat until the rice is fully cooked and tender. This may take longer than cooking biryani in a pressure cooker, but it will still yield a delicious and flavorful dish.
What is the best way to preserve biryani for a long time?
To preserve biryani for a longer period of time, allow it to cool down to room temperature before storing it in an airtight container. Refrigerate the biryani immediately to prevent the growth of bacteria. Biryani can be stored in the refrigerator for up to 3-4 days. Avoid reheating the biryani more than once, as it can cause the rice to become dry and hard.
How long can I store biryani in the refrigerator?
Biryani can be stored in the refrigerator for up to 3-4 days. Make sure to store it in an airtight container to prevent the growth of bacteria.
Does the Instant Pot burn rice?
No, the Instant Pot does not burn rice if it has water in it at all times. As long as you follow the recommended water-to-rice ratio and cooking time, you should be able to achieve perfectly cooked rice in your Instant Pot.
Why isn’t rice cooked in a pressure cooker?
Rice can be cooked in a pressure cooker, but it requires a specific water-to-rice ratio and cooking time. If the ratio is incorrect or the cooking time is too long, the rice can become mushy or overcooked. Therefore, it’s important to follow a trusted recipe and instructions when cooking rice in a pressure cooker.
Is pressure cooking easy?
Pressure cooking can be easy with the right equipment and knowledge. Modern pressure cookers come with safety features and clear instructions to ensure that the cooking process is safe and effective. With practice and experience, pressure cooking can become a simple and convenient method for preparing a variety of dishes.
What makes biryani dry?
Overcooking or insufficient moisture or fat can make biryani dry. It’s important to follow the recipe’s recommended water-to-rice ratio and cooking time. Additionally, make sure to cover the pot tightly while cooking to prevent the moisture from evaporating. Adding a little extra water or ghee can also help keep the biryani moist and flavorful.
Recipe
Instant Pot Chicken Biryani
Instant Pot Chicken Biryani is a delicious and flavorful one-pot meal made with aromatic spices, herbs, chicken, and rice cooked in an Instant Pot.
- Prep
- 30min
- Cook
- 40min
- Servings
- 4servings
- Calories
- 300kcal
Ingredients
- 2 cups Long-grain Basmati rice
- 1.5 lbs Chicken
- 1 cup Water
- 1/4 cup Ghee
- Whole garam masala (cumin, peppercorns, cardamom, cloves, cinnamon, star anise, bay leaves)
- 1 large Onions, sliced
- 1.5 tbsp Ginger garlic paste
- 1 tsp Turmeric
- 1 tsp Red chili powder
- 1 tsp Coriander powder
- 1 tsp Garam masala powder
- Salt to taste
- 4 Green chilies
- 1/4 cup Fresh coriander and mint leaves
- 3/4 cup Yogurt
- 1 cup Tomato puree
- 2 tbsp Ghee
Instructions
- 1 To begin, wash the rice in water until the water runs clear. Then, soak the rice in water for 20 minutes. Set aside.
- 2 Next, turn on the Instant Pot and select saute mode. Heat 1/4 cup ghee in the pot. Once the ghee is hot, add whole garam masala to the pot and fry for a few seconds until it starts to release its aroma.
- 3 Then, add sliced onion to the pot and fry until golden brown.
- 4 After that, add ginger garlic paste and fry for a minute or until the raw smell goes away. Add chicken pieces to the pot and fry for a few seconds until they are lightly browned.
- 5 Next, add turmeric powder, red chili powder, coriander powder, garam masala powder, and salt to the pot. Stir well.
- 6 Then, add slit green chilies and fry everything together until the chicken is nicely coated with the spices and starts to release its fragrance.
- 7 After that, add chopped fresh coriander and mint leaves, yogurt, and tomato puree to the pot. Stir everything together.
- 8 Once everything is well mixed, cancel the saute mode. Close the Instant Pot lid and turn on high pressure mode for 3 minutes.
- 9 After 3 minutes, do a quick pressure release. Open the lid and check the consistency of the gravy. If it's too thick, add some water. It should be of a gravy-like consistency.
- 10 Now, add soaked rice and 1 cup water to the pot, making sure all the rice is under the liquid. Close the lid and turn on high-pressure mode for 5 minutes.
- 11 Once the cooking is complete, let the pressure release naturally for 5 minutes. Open the lid and add ghee, fresh coriander leaves, and mint leaves to the pot. Fluff the biryani with a fork.
- 12 Finally, serve the biryani hot with raita or your favorite side dish. Enjoy!