The Best Idli Dosa Batter Recipe

For most of us, dosa and spongy idli is a special treat. Dosa is an impossibly sour, buttery, crispy, deliciousness that can only be created in the kitchens of the elusive dosa chef. And Idli is a wonderfully spongy, soft, and fragrant rice cake that magically enhances the flavor of any curry it’s dipped in. But in South India, dosas and idlis are sown into the fabric of everyday life. They are made on the carts of street vendors, in the finest South Indian restaurants, and in Ama’s (Mom’s) or Paatti’s (Grandma’s) kitchens. Anywhere that has a warm place, a little water, and some rice and urad dal can ferment this life giving and inspiring creations! Today, I will show you how to make soft idli and crispy dosa from a simple idli dosa batter recipe.
Idli and Dosa made from a simple idli dosa batter recipe
But making perfect idlis and dosas with batter made from scratch is beyond the reach of us normal folk, right? To my surprise, it is not rocket science or brain surgery (lol - funny if you know who I am). If I can fold perfect dosas for my children everyday in Eastern Washington, then anyone can do it. Let me show you how.
Idlis and Dosas
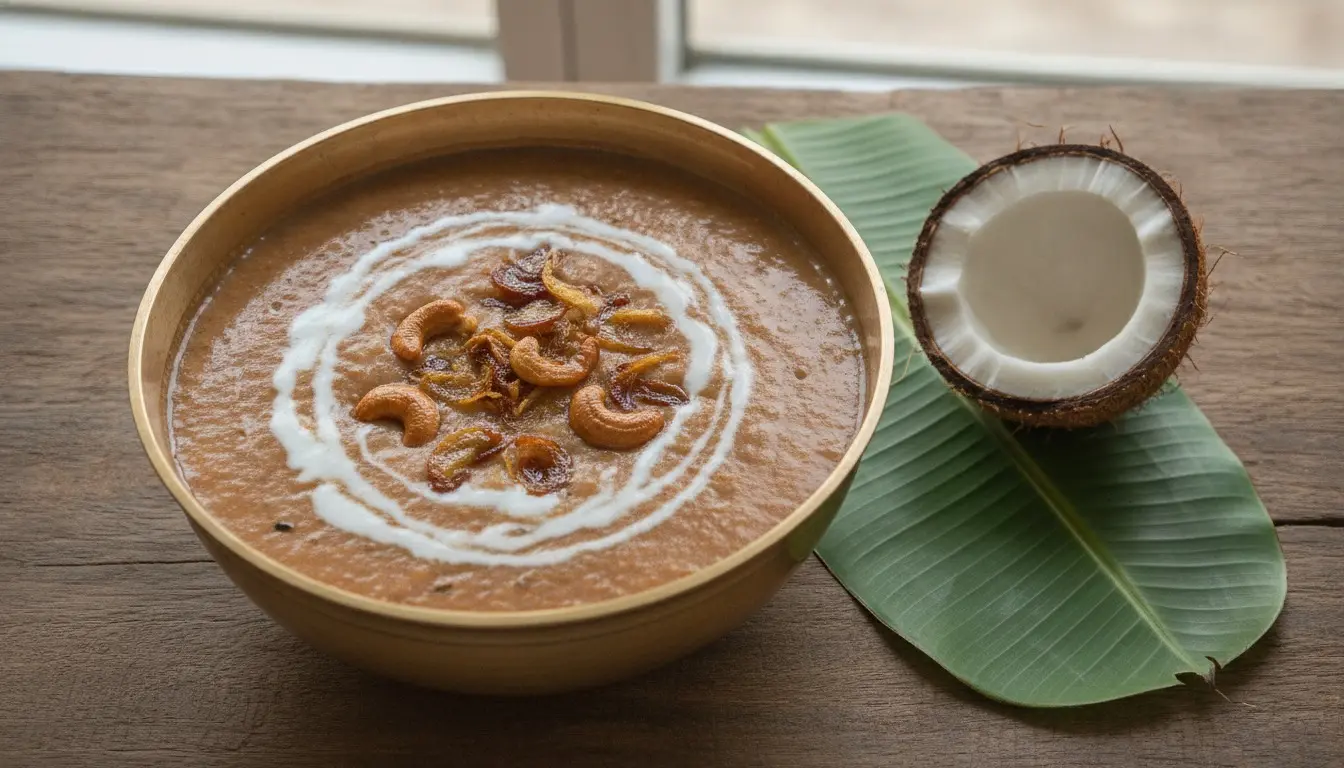
For those of you who are not familiar with South Indian food, you’re in for a real treat. Idlis are soft and spongy steamed rice cakes, and dosas are a kind of South Indian crêpe. They are eaten for breakfast, lunch, dinner, snack, and dessert. We usually eat them with sambar, and coconut chutney as a dip.
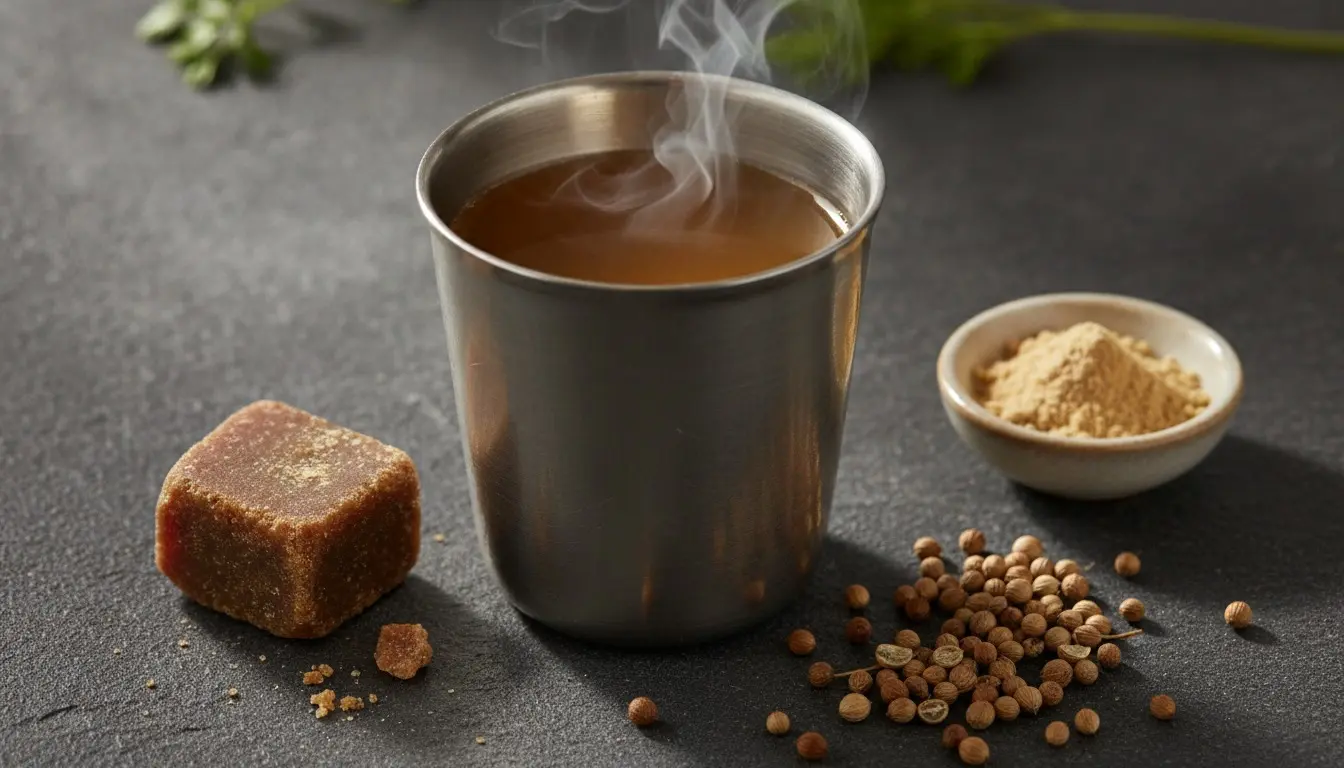
Sambar over idli
Like every culture, South Indian culture has a few staples. North Indians cannot live without their rotis and parathas, South Indians cannot survive without our idli and dosa. Soft idlis infused with the aroma of fenugreek seeds and buttery crispy dosas can brighten your mood anytime of the day. These are my go-to comfort foods.
Idlis and dosas can be made from the same batter, but will only be successful during different stages of its fermentation life. The ratio of rice to urad dal and the techniques for making these delicious creations varies from household to household, and from region to region. Ask ten different Paattis how they make idli and dosa, and you’ll get 10 different answers. Many just make idli and dosa like their Paattis made it, without specific measurements or ratios. However, since we can not just say ‘a little of this and a little of that’, I have carefully developed this recipe based on prevailing wisdom and lots of trial and error. With precise measurements, you can keep the result consistent, which is key to consistent enjoyment.
So roll up your sleeves and wipe down your counters! Let us make some fluffy idlis and crispy dosas with this homemade idli dosa batter.
What is this Idli Dosa Batter Recipe made of?
Idli batter and dosa batter can be made separately, but it can also be made as an idli dosa batter recipe that can make both idle and dosa. To achieve this dual functionality, follow this step-by-step process for my homemade idli dosa batter recipe.
Generally, we just use four ingredients to make idli dosa batter. Whole or split urad dal (black gram), idli rice, non-iodized salt, and fenugreek seeds (methi seeds).
The ratio of these four ingredients, how you blend them, and how well the fermentation process is carried out determine whether your idli batter or dosa mix is a hit or a miss.
Let us first have a detailed look at the ingredients before we jump to how we make it. These ingredients are few in number, but finding the right quality and mixing the right quantity is super important. All of these ingredients are easily available at any Indian store.
Ingredients
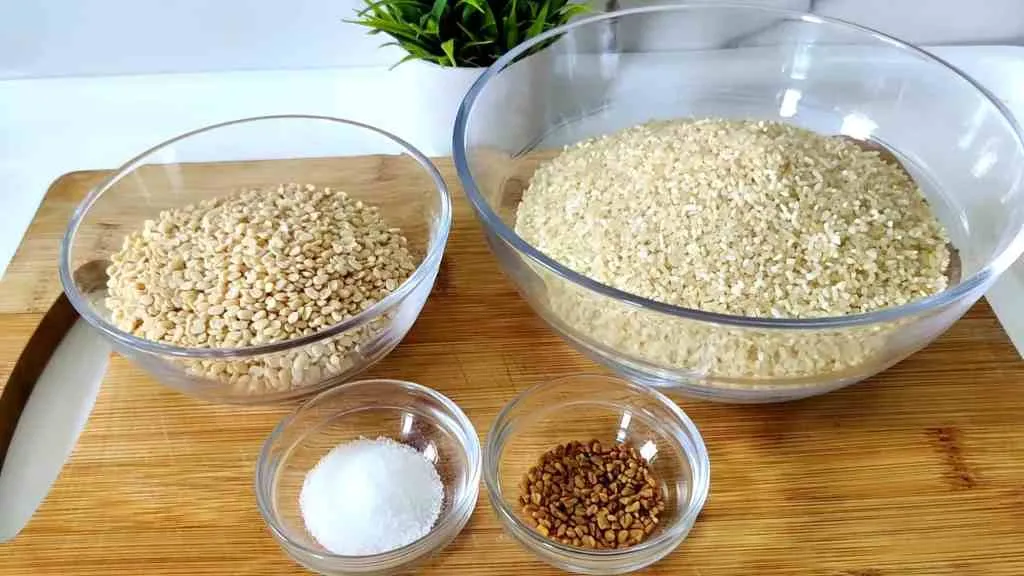
Ingredients for Idli Dosa Batter Recipe
Dal
You need top-grade and preferably organic lentils to make your idli dosa batter perfect. It can vary but generally whole skinless/dehusked urad dal, also known as urad gota is used in this batter. Some people also use split urad dal. I have found no difference in quality of my batter between whole and split urad dal.
Idli Rice
For this idli dosa batter recipe, always use idli rice or a par boiled short grain rice. Never use a long grain rice type like basmati as the end result will be inferior. The idli rice grains are smaller, starchier, and thicker to produce a creamier and fluffier texture when ground.
Salt
It might seem insignificant to talk about salt here, but it is important. Using iodized salt or salts with anti-caking agents, can result in a poorly fermented batter. As with all living food, it is all about the chemistry. So the pro-tip is to always use non-iodized unadulterated salt for the process. Sea salt, kosher salt, and rock salt all work fine.
Fenugreek Seeds
Also called methi seeds. Don’t skip these if you want a nicely fermented fluffy batter. Fenugreek has special prebiotic fibers which encourage robust fermentation. They also add a hint of flavor.
The Ratios
This is honestly a bone of contention. If I say this is ‘right’ and that way is ‘wrong’, I’ll offend millions of Paattis around the world. The truth is that there is no right or wrong way to make dosa and idli. The only thing that matters is the end result.
However, now that the question of ratio is obligatory to discuss, I’ll tell you what works for me. I have experimented with different ratios, but to achieve fluffy idlis and crisp dosas, 4:1 ratio of idli rice to urad dal has always worked best for me.
4:1 means, four parts idli rice to one part urad dal. So, if you are using four cups of rice to make the batter, you need one cup urad dal.
Directions
Let’s get started with the process. It is not tough, just technical. So, read on and keep these pro-tips in mind to achieve the perfect idli dosa batter.
Washing
I am listing this step separately to emphasize its importance for proper fermentation. ALWAYS wash your rice and lentils to achieve the perfect, fluffy batter for idli and dosa. Many people skip this step, which ends up in a starchy buildup and their batter doesn’t turn out as perfect as it should.
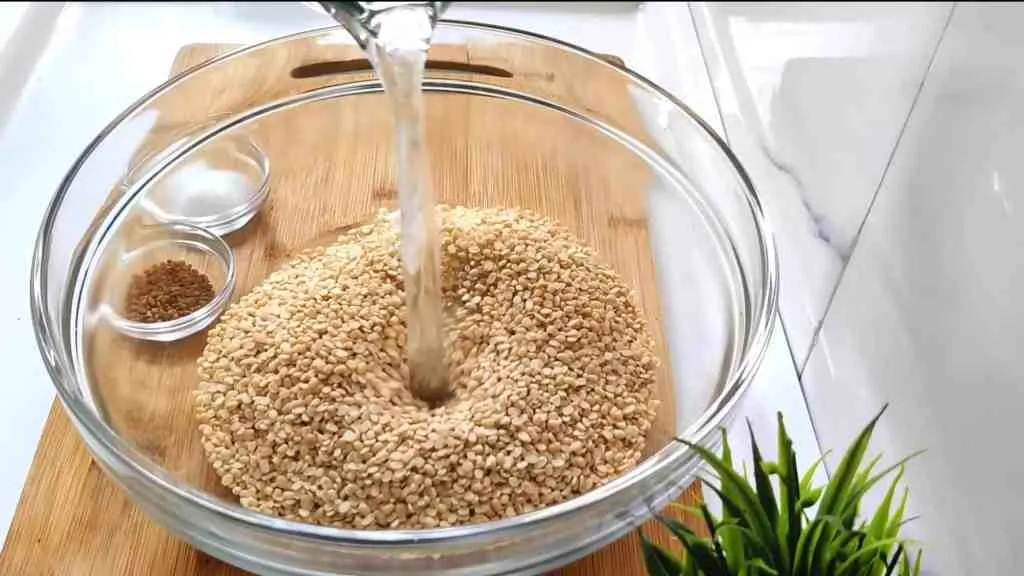
Wash your rice and dal
Soaking
After you are done washing the idli rice and the whole urad dal, now is the time to give them a good soak. I soak them together in the same bowl to make the process simpler. Add 1 tsp of fenugreek seeds to it. It will help with fermentation and flavor. Ideally, soak the dal and rice overnight to achieve the best results. Otherwise, at least soak them for four to six hours.
Soak the rice, dal, methi, and salt
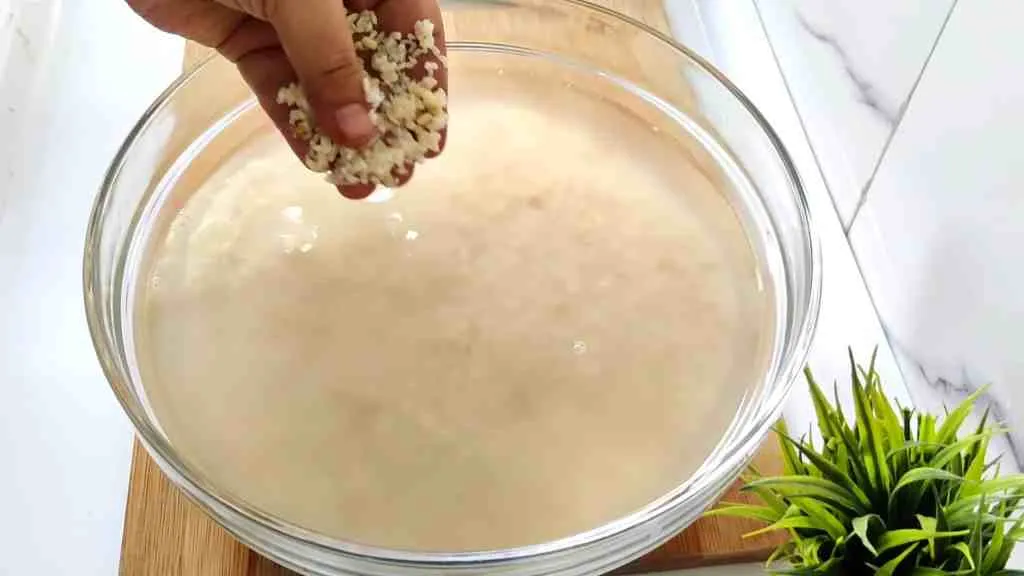
Grinding
The next step is grinding your batter. You can use a wet grinder or a grinder mixer of your choice. A traditional blender or a VitaMix will do a reasonable job. Traditionally, stone wet grinders were used to grind the mixture, as they incorporate more air, heat up less, and make the batter fluffier. On the other hand, electrical blenders can heat up quickly. It is debatable whether this disturbs the end result of your idli and dosa batter. I made batter in a blender for years with good results before finally getting a wet grinder.
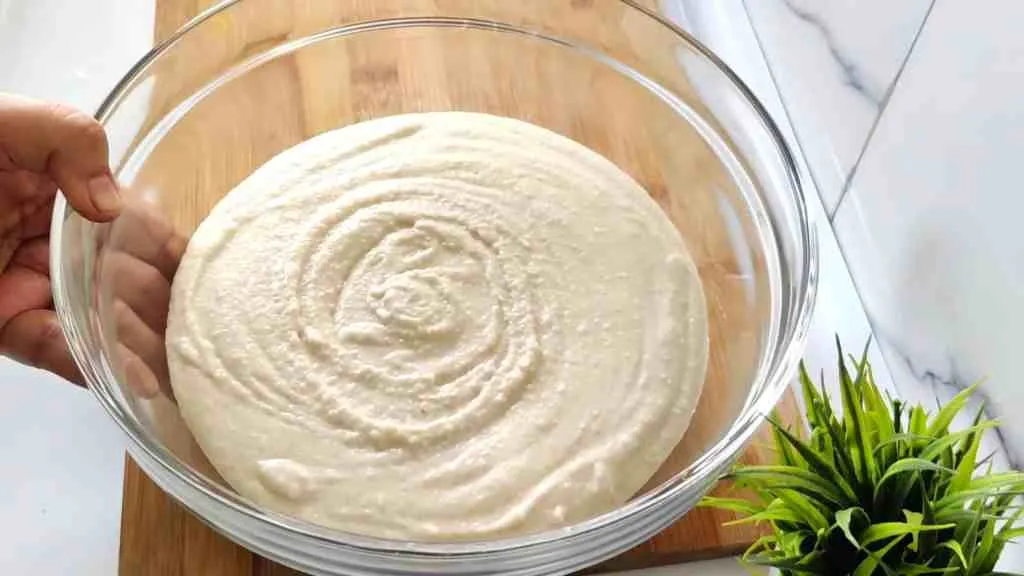
Ground rice and dal to create idli dosa batter
Traditionally, the urad dal and idli rice are ground separately and then combined after the fact. I have ground them both separately and together and have found no meaningful difference in end result. So, to keep things as simple as possible, I grind them together.
Here are my pro-tips for blending dosa batter.
Do not add all the rice or lentils at the same time. Grind in small batches to achieve the perfect batter.
Add ice cold water to the batter as you blend it until you get a small swirling funnel in the middle of the blender. Do not add water past this point, or you will end up with a batter that is too thin.
When the mixture is a smooth thick batter with a small amount of grit in it, take it out and add the next batch.
Repeat until all the rice and dal is blended.
Fermentation
Now this step can make or break your idli dosa batter. After you are done grinding the batter, it is time to ferment. Pour the idli dosa batter into a pot/bowl that you want to use for fermentation, now add 1 tbsp of live yogurt and a sprinkle of dry active yeast. Once the yogurt and yeast is mixed in, do not leave it in a cold place. It must be kept somewhere warm like in an oven with the light on, on top of a refrigerator, or in an instant pot with the yogurt button pushed.
Make sure you have enough room left in your vessel, as good fermentation will increase the volume of the idli dosa batter 2-3 fold. Some people add salt after fermentation, but I prefer adding it during this step, as a salty batter will encourage lactic acid producing bacteria that gives dosa its characteristic sour kick.
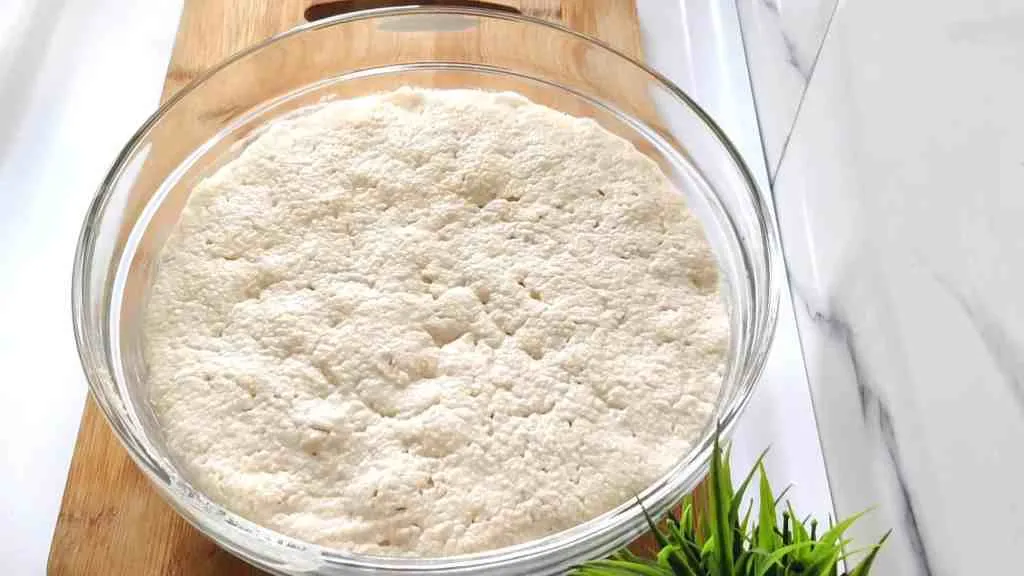
Fermented and frothy idli dosa batter
It will take around 6-10 hours to ferment, but the yeast should start bubbling the batter within an hour. Idli dosa batter recipes are traditionally left to ferment overnight, so they are ready to use in the morning and throughout the next day.
Usage your Idli Dosa Batter
Now that your homemade idli dosa batter is fermented, you can start making some delicious idli and dosa.
Idli and dosa batter has two stages.
First Stage of Idli Dosa Batter
In its first stage, the batter is frothy and light. This is when available sugars are still present and the yeast is rapidly turning them in to carbon dioxide. During this stage, the lactic acid producing bacteria have also started to sour the batter very slightly. This point is reached around the 10-hour mark in temperate climates; sooner in tropical climates. The first stage is perfect for making idli. You can make regular idlis using a steamer, a pressure cooker, or even fryhttps://paattiskitchen.com/fried-idli-and-masala-idli-recipe/ them.
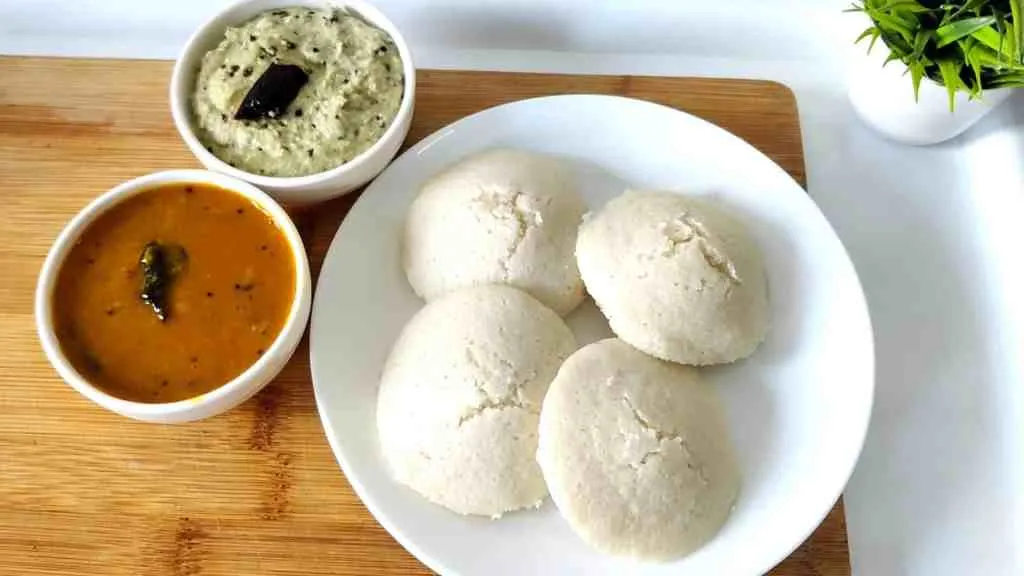
Perfect Idli
Second Stage of Idli Dosa Batter
The second stage is when the level of lactic acid lowers the pH enough to where the yeasts stop multiplying and metabolizing starch to carbon dioxide. In this stage, the batter is flat and fairly sour. This is the perfect stage for making dosa that you can serve with chutneys. Once the batter reaches its second stage, store it in the refrigerator.
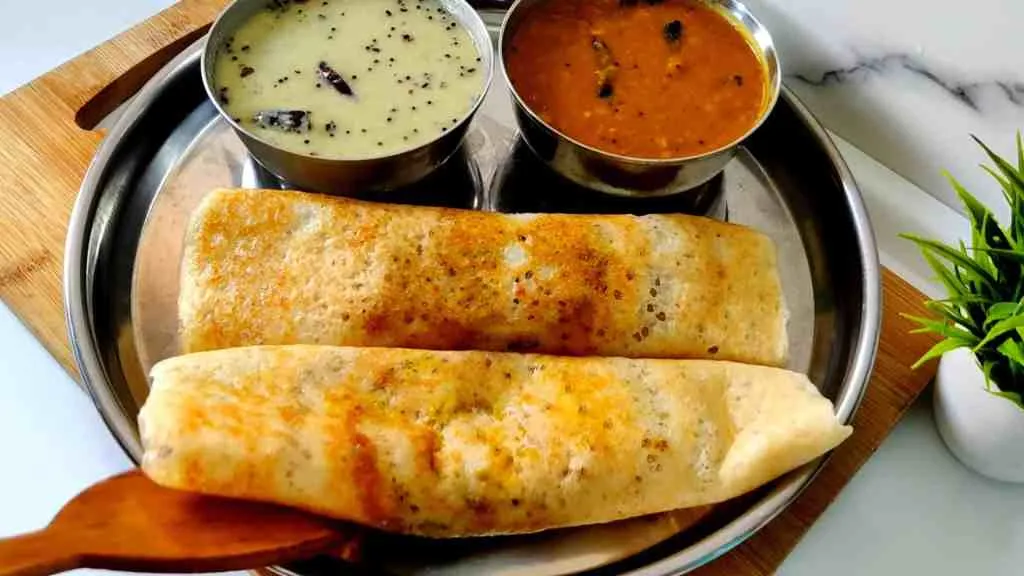
Perfect Dosa
If you try making dosa during the first stage and idli during the second stage, you’ll end up with fluffy soft dosa and flat rubbery idli. This is not what we are going for. So respect the life cycle of your idli dosa batter.
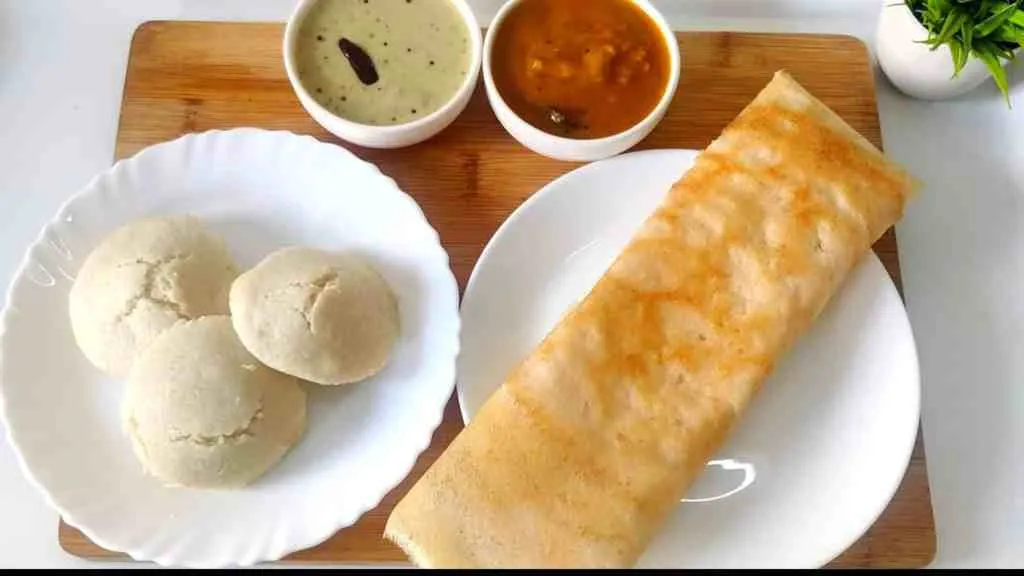
Making Idli
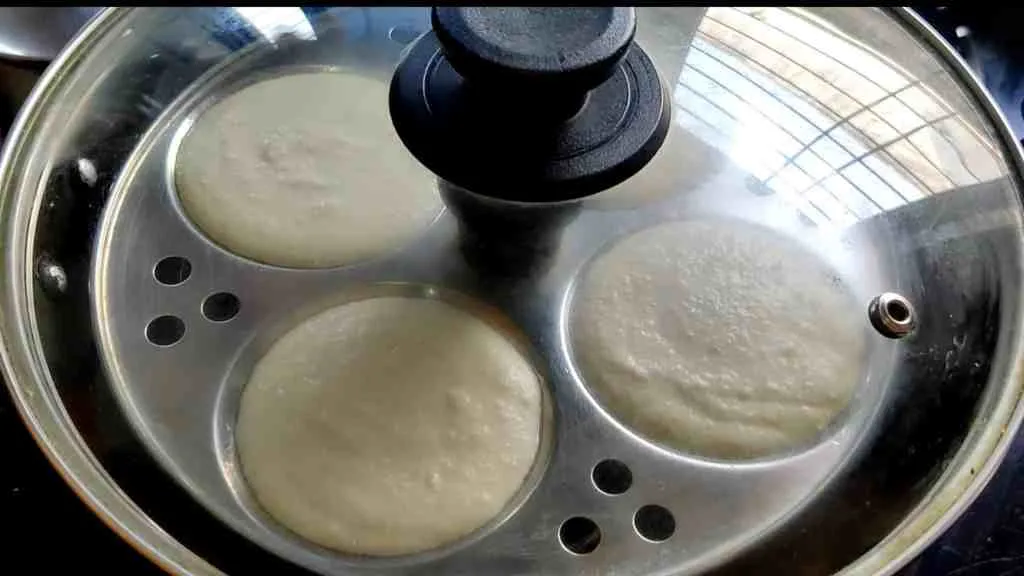
To make fluffy idlis, take out some of the batter during its first stage, grease your idli plates or idli molds and pour a spoonful of batter on each one of them. Boil 2-3 cups of water in your idli steamer and steam your idlis on high heat for 10 to 12 minutes to get spongy idlis perfect to go with sambar or coconut chutney. If you are steaming your idlis in a pressure cooker or Instant Pot, make sure to keep the steam vent open. You can see my comprehensive idli cooking recipe here.
Steaming idlis
Making Dosa
For the perfect crispy dosa, ladle the same batter during its second stage on a greased flat tawa, cast iron or carbon steel pan, or nonstick pan, and spread it in circles to make crisp dosas out of it. Add in the potato masala for a masala dosa. You can also use this batter to make uttapam, paniyaram, etc. You can see complete instructions for cooking perfect dosa here.
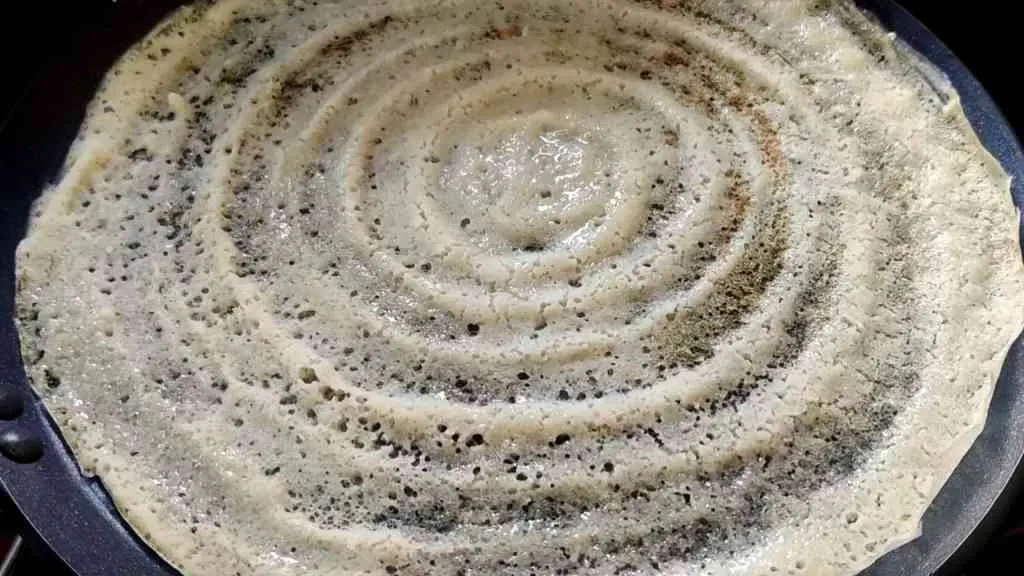
Spread your dosa batter thin
Storage and Use of Idli Dosa Batter
You can store it in the refrigerator for use, but for soft, spongy idlis, I prefer making fresh batches. Prepare it with love, it will ferment better and taste like home!
FAQs
Is idli batter the same as dosa batter?
Yes, but in traditional south Indian homes, they are made separately with a higher dal ratio in idli batter. However, if you follow my recipe, you can use the same batter for both.
What can be made of idli batter?
You can make idlis and dosas. With certain variations, you can make paniyaram, uttapam, dhokla, handvo, vadas etc. They all use similar batters with different cooking techniques.
Can I use basmati rice for idli dosa batter?
No, you cannot use long grained rice for idli or dosa batter and expect a good result. That being said, I have done it. To make perfect idlis and dosas, you need small grained fat idly rice, which is already parboiled and readily available in Indian stores.
Why is methi added to idli batter?
Methi or fenugreek seeds add a distinct flavor to the idli dosa batter, and they are also believed to improve the fermentation process. They are not essential, but I always get a better result when I use them.
Why are my idlis not fluffy?
There can be a number of reasons why your idlis are not fluffing up, but usually it is because the batter is either under fermented or over fermented. You want to make idli when it is maximally airy from robust fermentation and the lactic acid bacteria have begun to add some complex flavors to the batter. Sometimes your culture can be predominantly lactic acid producing bacteria which do not make much CO2. That is why it is a good idea to add active dry yeast if you plan to make idli. Too much water can also make the batter too thin, which prevents the idli batter from holding in the carbon dioxide bubbles required to achieve fluffiness.
Recipe
The Best Idli Dosa Batter Recipe for Soft Idli and Crispy Dosa
Today, I will show you how to make soft idli and crispy dosa from a simple idli dosa batter recipe.
- Prep
- 120min
- Cook
- 20min
- Total
- 70min
- Servings
- 4servings
- Calories
- 300kcal
Ingredients
- 4 cups Idli rice
- 1 cup Urad dal
- 2 tsp non-iodized salt
- 1 tsp fenugreek seeds or methi seeds.
- 1 tbsp live yogurt
- 1 pinch of live active yeast
- 1 pinch of live active yeast
- water, as needed
Instructions
- Batter Preparation
- 1 Wash the rice and lentils four or five times until the water runs clear.
- 2 Then soak the dal, idli rice, fenugreek seeds, and salt in a bowl with enough water to completely submerge them. Leave them to soak overnight to get the best results.
- 3 After soaking them for a minimum of 4-6 hours, grind the mixture in batches in a wet grinder, blender, or grinder mixer. The goal is to get a wet fluffy batter that pours from a ladle, but is not runny. If your blender cannot handle the mixture, add just enough water to get it swirling. Once the grinding is complete, you will still feel a small amount of rice grit when you rub the batter between your fingers.
- 4 The next step is fermentation. Add the yogurt and a sprinkle of yeast to the mixture and stir in well. Cover the mixture with a lid, and if the weather is hot enough, leave it on the counter to ferment. Otherwise, put it in the oven to ferment with the oven light on or use the yogurt setting of an Instant Pot to ferment your batter for at least 10 hours, or better overnight. The batter will rise significantly, so use a large enough vessel to accommodate.
- Making Idli
- 5 To make fluffy idlis, take out some of the batter while the batter is frothy and fermentation is vigorous. Grease your idli plates or idli molds and pour a spoonful of batter on each one of them. Boil 2-3 cups of water in your idli steamer and steam your idlis on high heat for 10 to 12 minutes to get spongy idlis perfect to go with sambar or coconut chutney. If you are using a pressure cooker, leave the rocker off of the steam outlet. You can see my comprehensive idli cooking recipe here.
- Making Dosa
- 6 For the perfect crispy dosa, wait until the fermentation has settled down, and the batter has slightly soured. If the batter is too thick, add some water to it. You want it to be slightly thinner than pancake batter.
- 7 Ladle the same batter on a greased flat tawa, greased cast iron pan, or non-stick pan.
- 8 Spread it in circles until the batter is spread very thin. The thinner you spread it, the crispier the dosas will be.
- 9 Spray or drip coconut oil or ghee over the top of the dosa as it cooks.
- 10 Add in the potato masala for a masala dosa. You can also use this batter to make uttapam, paniyaram, etc. You can see complete instructions for cooking perfect dosa here.