Indian Ghee Recipe: A Journey to the Heart of Indian Cooking
Are you ready to take your taste buds on a delicious journey to India? Then let’s talk about one of the most beloved ingredients in Indian cooking: Ghee! Indian ghee is a type of clarified butter that is commonly used in Indian cuisine. It’s made by simmering butter until the milk solids separate from the golden liquid.
But Indian ghee is not just any ordinary butter; it’s butter that has been transformed into a rich, nutty, and aromatic ingredient that can add depth and flavor to any dish. Indian ghee is often referred to as “liquid gold” due to its many health benefits and rich flavor. It holds a significant place in Indian rituals and ceremonies. Homemade ghee made with organic, grass-fed butter has a nutty flavor and aroma, and a high smoking point, making it an ideal ghee for deep frying and sautéing.
Making ghee is like performing a magical alchemy in your kitchen. You start with simple butter, but with a little heat and patience, it transforms into something truly special. As the butter simmers, the milk solids separate and sink to the bottom, creating a frothy layer on top. As the froth subsides, you have a beautiful golden liquid that smells like heaven. This liquid is your ghee, and it’s ready to take your cooking to the next level. Ghee is a staple in Indian cooking because of its rich flavor and high smoke point, which makes it perfect for frying, sautéing, and roasting. You can use it in everything from curries and dals to rice dishes and desserts. And the best part? Ghee is incredibly easy to make at home, so you can enjoy its deliciousness whenever you want.
Ghee has been an integral part of Indian cuisine for centuries. You can trace the history of Indian ghee back to ancient times when it was known as ‘ghrita’ in Sanskrit. In Indian culture, ghee has been used in religious rituals, as well as for cooking and medicinal purposes. Traditionally, ghee was made by simmering unsalted butter over medium heat until the milk solids settled to the bottom of the pan and turned golden brown. The clear, golden liquid was then strained through a fine-mesh strainer and stored at room temperature. The process of making ghee was time-consuming and required a lot of patience and attention to detail. Today, with the advent of modern kitchen appliances like the Instant Pot, making ghee has become easier and less time-consuming. However, many people still prefer to make their own ghee the traditional way using high-quality butter.
Ghee is a great option for deep frying, as it has a high smoke point and you can reuse it multiple times. The nutty flavor and aroma of ghee add a unique depth of flavor to Indian dishes. Ghee has also become a popular ingredient in the Western world and you can now find it in many grocery stores. However, many people still prefer to make their own ghee for its superior flavor and quality. Whether made at home or store-bought, ghee remains a beloved ingredient in Indian households and a key component of Indian cuisine. So let us make it together with this easy Indian Ghee recipe.
Ingredients For Indian Ghee Recipe
Milk
Milk is the main ingredient in this Indian Ghee recipe, and it contributes to the flavor, texture, and aroma of the final product. It is important to start with non-homgenized and preferably grass fed milk. If you do not use non-homogenized milk, the cream will not separate. The milk provides the fat that is necessary to create butter and subsequently ghee. The milk’s proteins also play a crucial role in flavor development during the fermentation process, which occurs when adding curd/yogurt to the milk. The curd/yogurt contains live bacteria that convert lactose in milk to lactic acid, which thickens the milk and gives it a slightly tangy taste.
Curd/Yogurt
The curd/yogurt starter added to the milk initiates the fermentation process, which is critical for butter flavor. The bacteria in the curd/yogurt consume lactose, which thickens the milk and infiltrates the thick cream that makes butter. The curd/yogurt’s acidity helps to break down the milk’s proteins and fats, leading to a more complex and tangy flavor in the final product.
Step By Step Instructions For Indian Ghee Recipe
I will show you how to make ghee starting from milk. But if you rather start from butter, buy high quality butter like Kerry Gold and begin the process from the butter stage detailed below.
To start this Indian Ghee recipe, boil 1 liter of non-homogenized milk in a saucepan and let it cool. Once it cools, the thick cream will form on top of the milk. It is crucial to use non-homogenized milk.
Next, transfer the warm milk with cream to a bowl and add 1/2 tsp yogurt/curd. Mix well and cover the bowl.
Then, keep the bowl in a warm place for 5-6 hours, allowing the milk to ferment and curdle. A thick layer of fermented cream will form on the top.
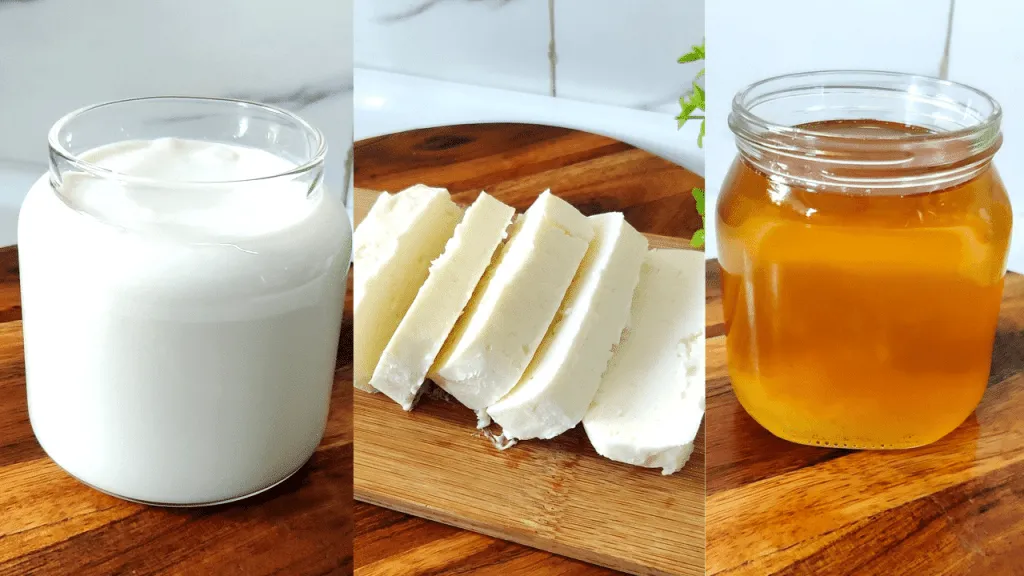
After that, collect the cream from the prepared curd in an airtight container and store it in the refrigerator. Keep collecting the cream for 10 days until you have a good amount.
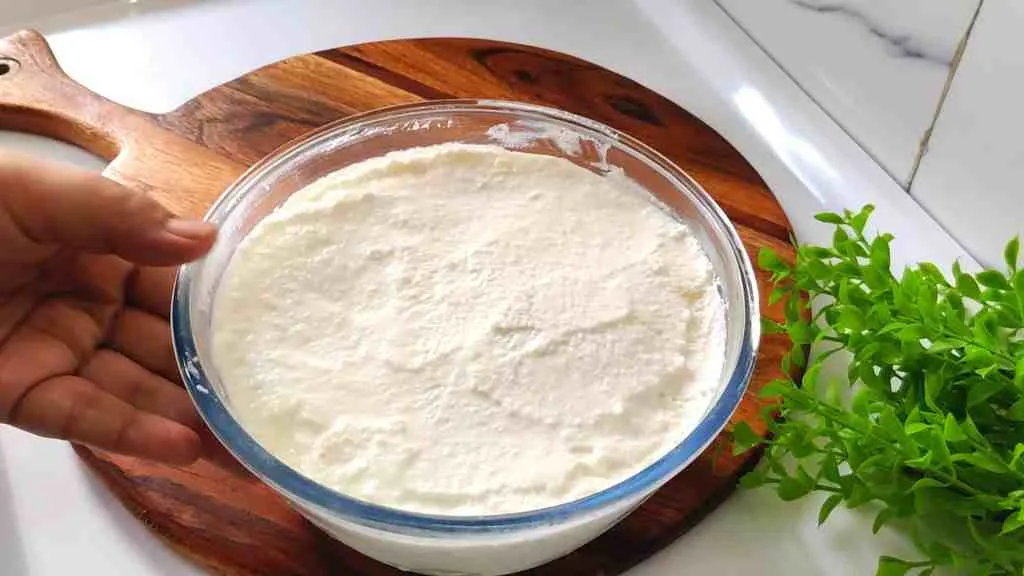
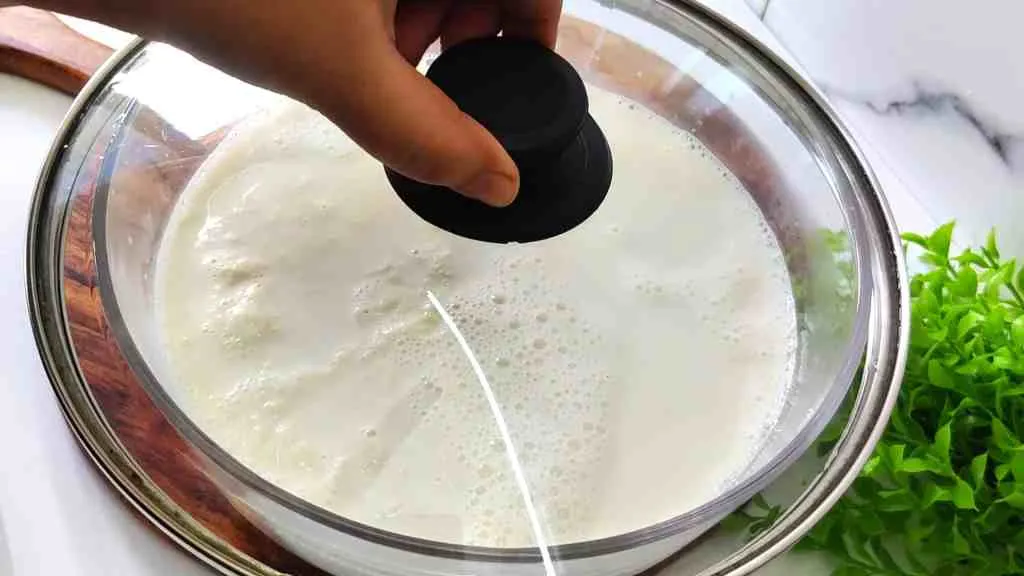
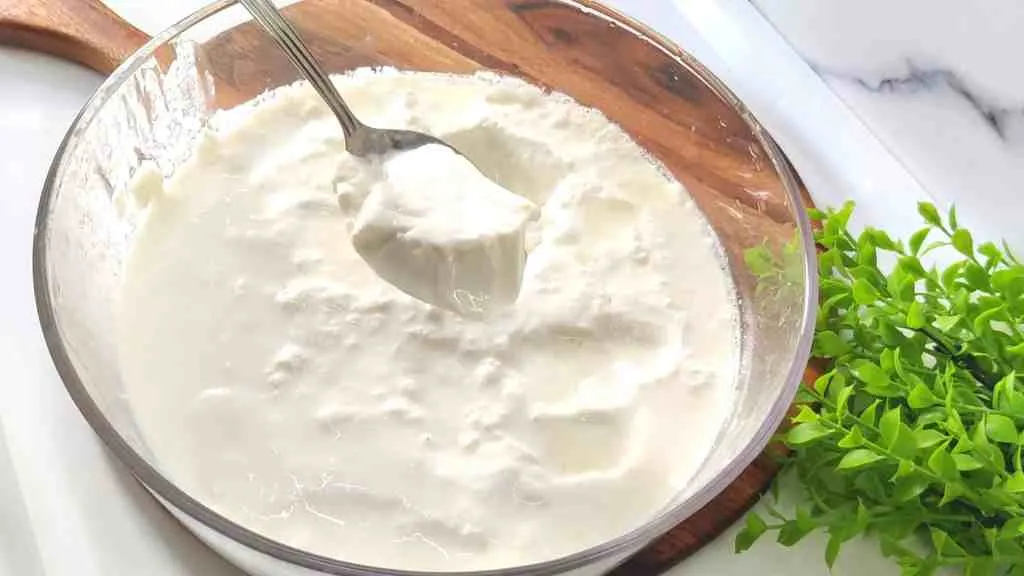
Once you have collected enough cream, transfer it into a mixi jar or blender along with 1 cup of water. Blend the cream in 2 batches with 1 cup water, blend for a minute or until butter separated from the buttermilk. You can add more water if needed.

After blending, transfer the butter and buttermilk into a large bowl. Gather all the butter by moving it to one side using a spatula or your hand. You will get a large sized butter ball.
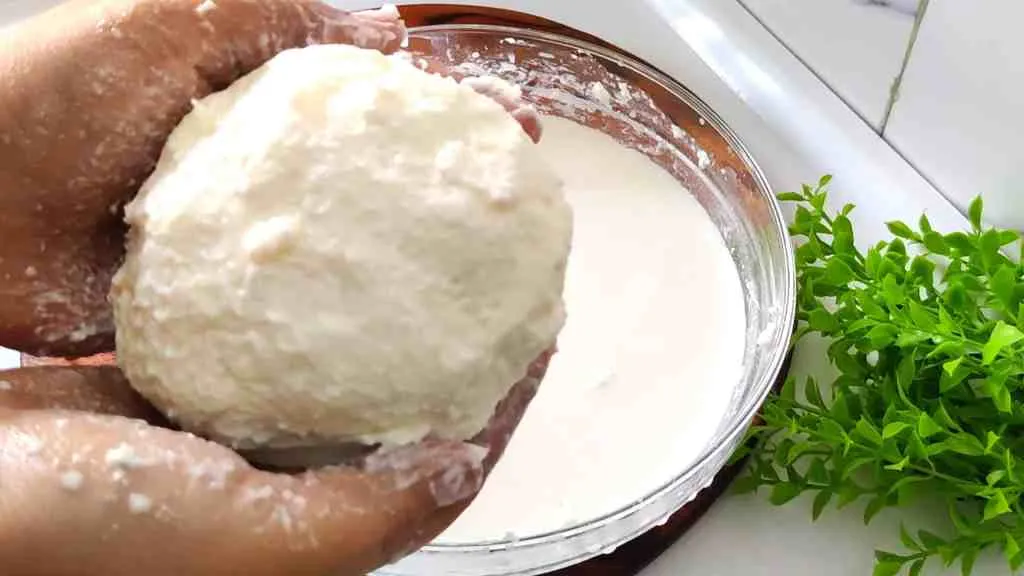
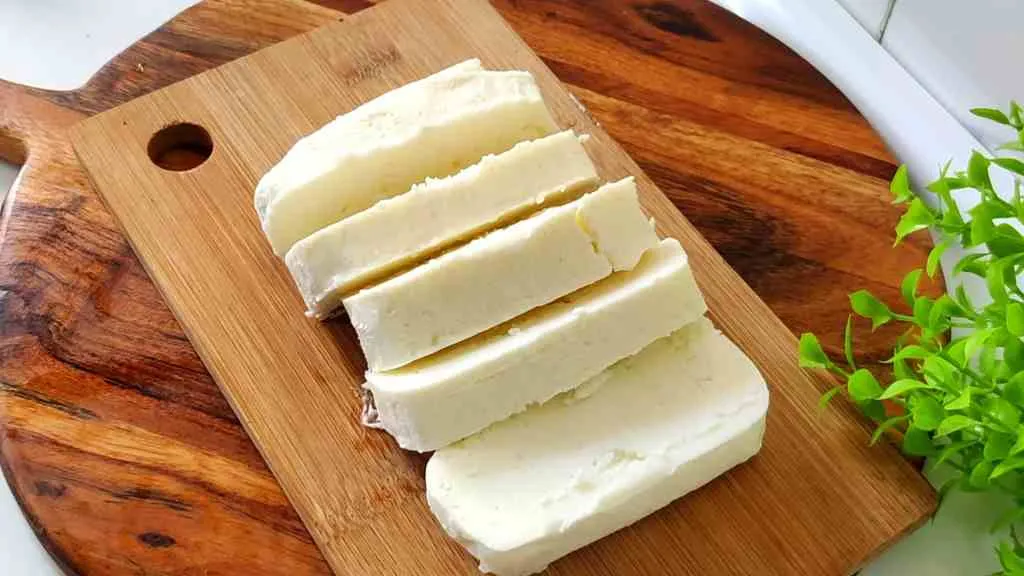
Next, shape the butter, wrap it in wax paper, and keep it in the fridge to set for 30 minutes. After 30 minutes, slice the unsalted butter.
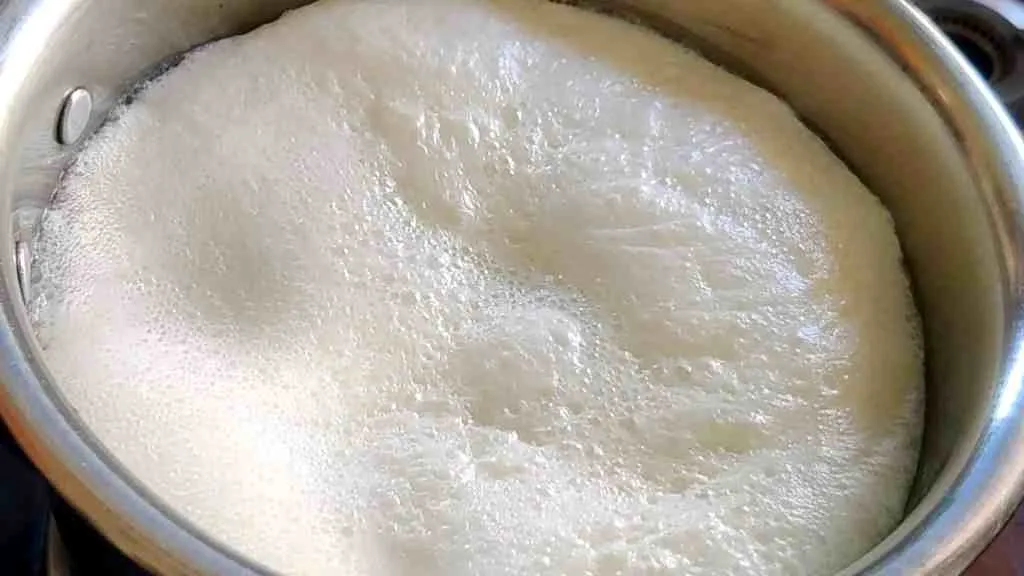
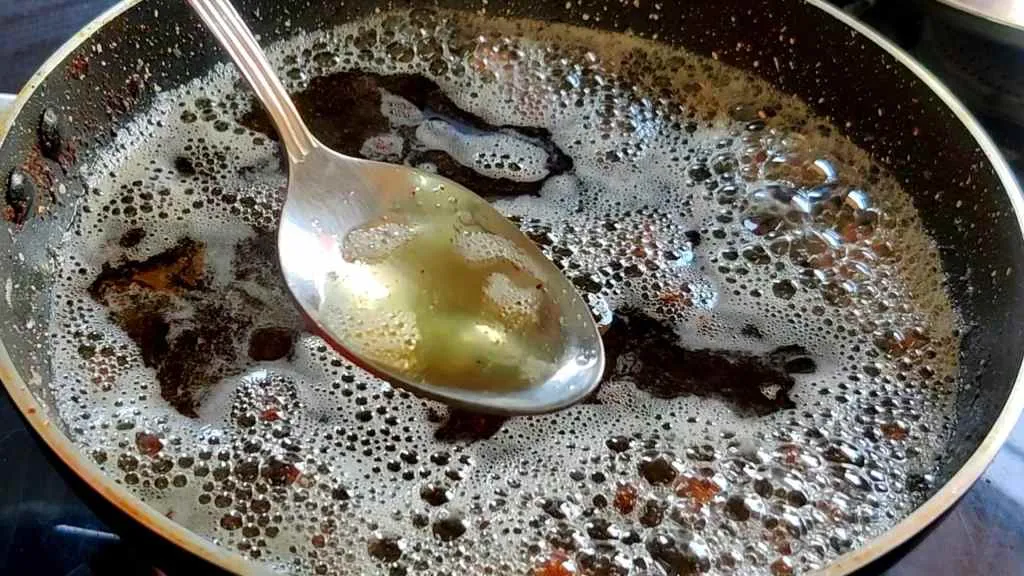
To prepare the ghee, add the butter to a heavy-bottomed pan and keep the flame on low heat. Melt the butter completely.

Then, continue boiling the melted butter for several minutes until the ghee turns golden and the bubbles turn transparent.
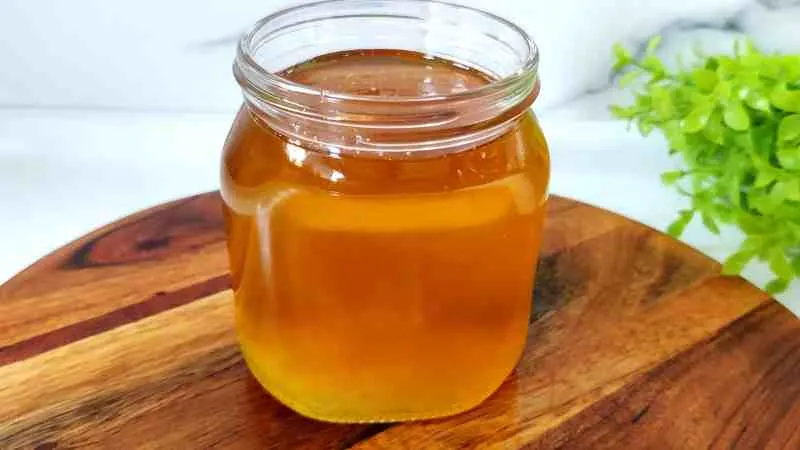
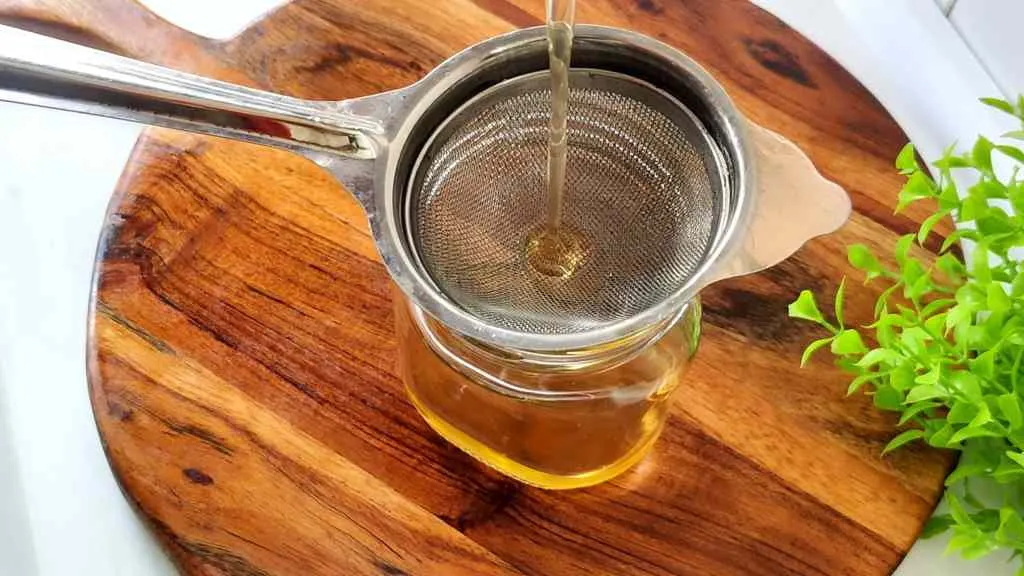
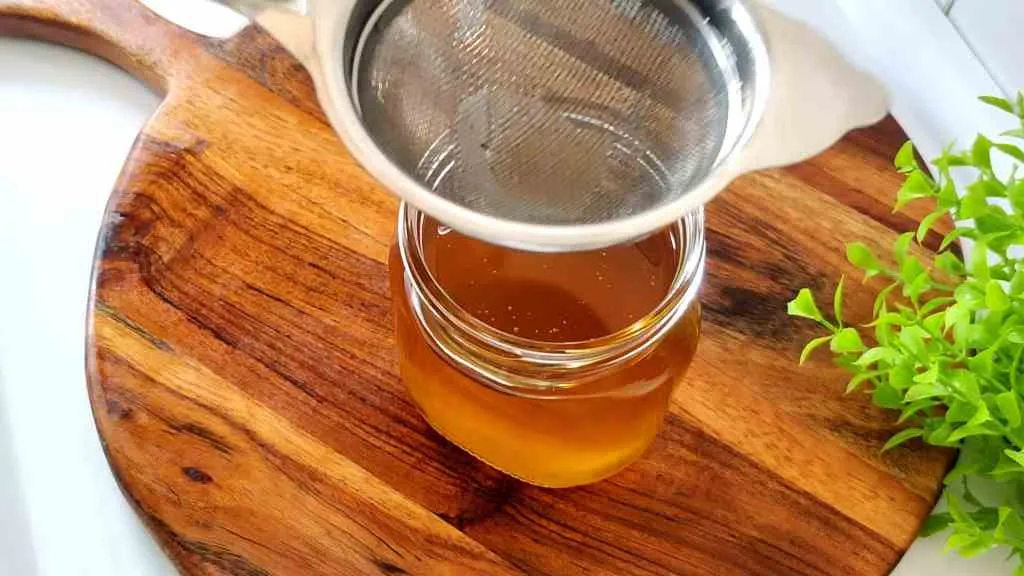
Once done, turn off the flame and let it slightly cool. Finally, filter out the ghee using a fine-mesh strainer and store it in a clean glass jar.
Finally, your homemade ghee, along with the buttermilk and unsalted white butter, are now ready to enjoy!
Serving Suggestions
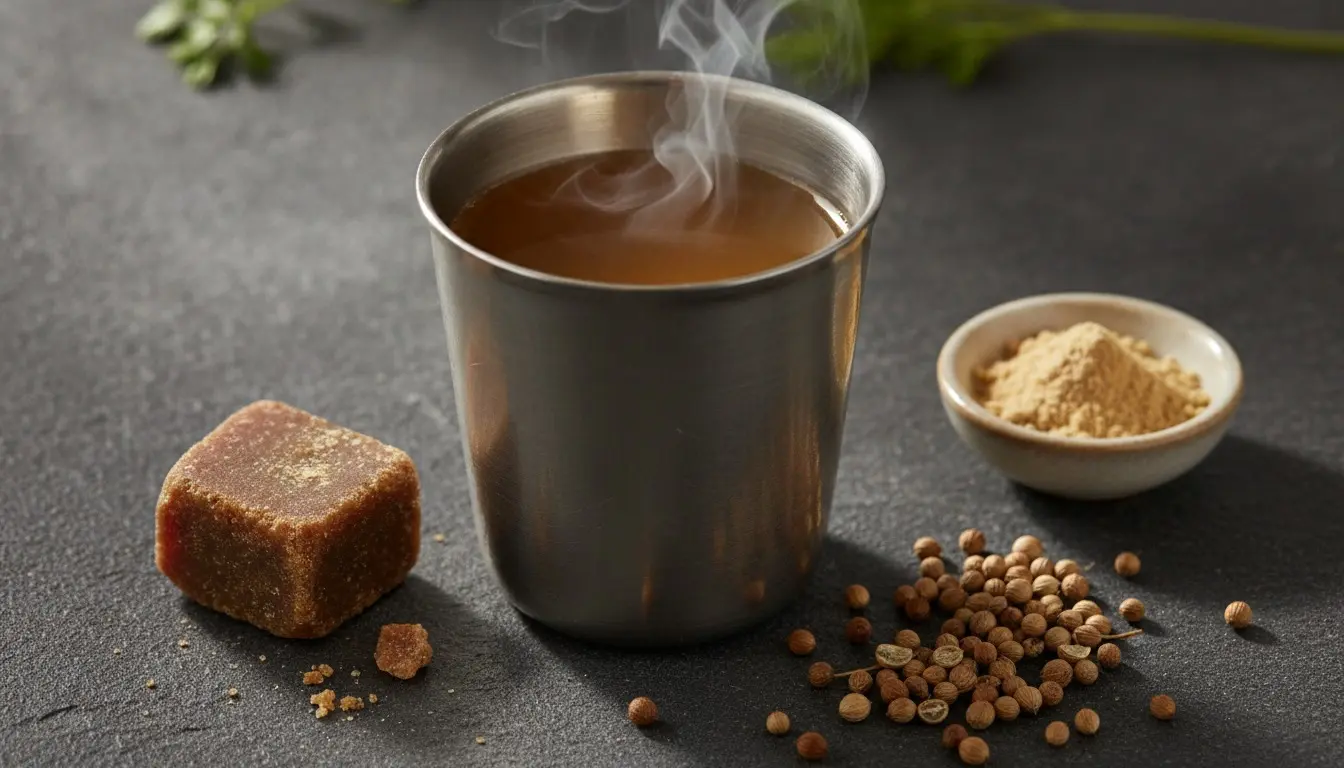
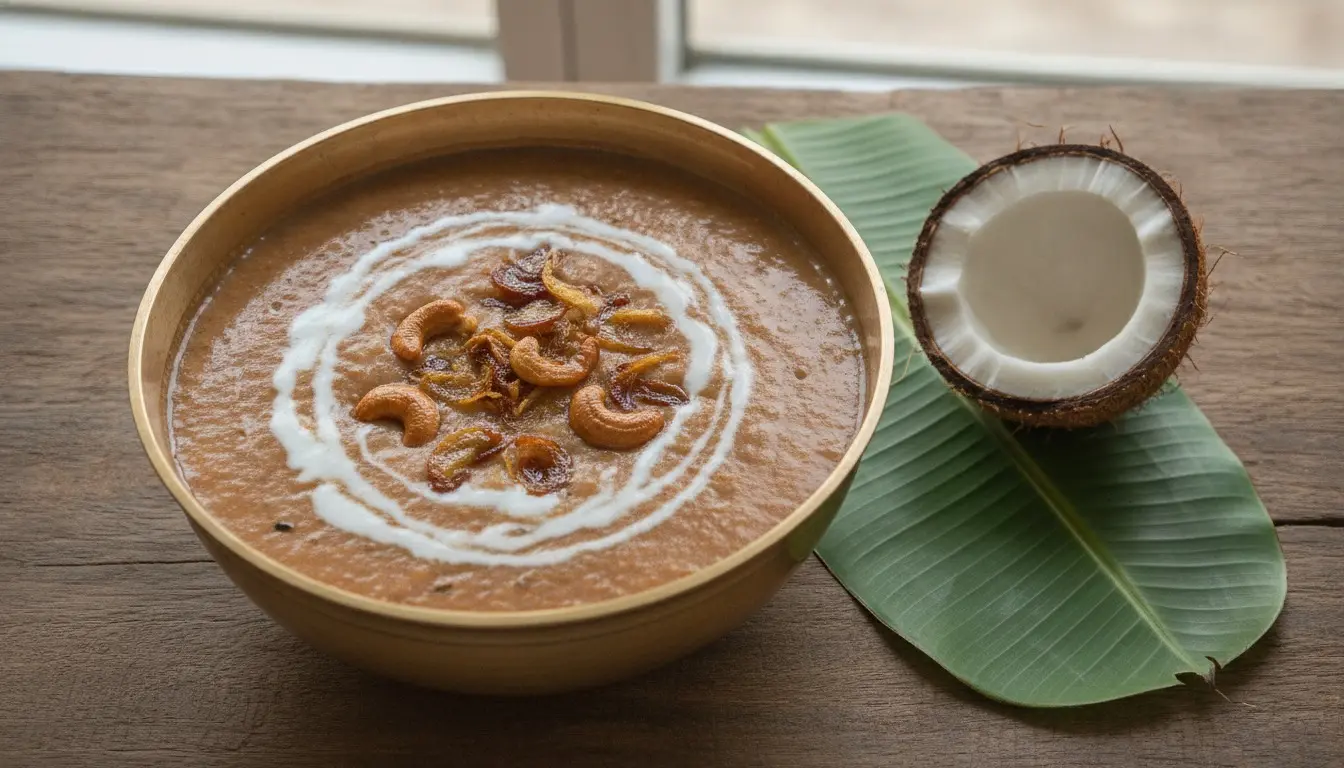
You can use Indian ghee in a variety of ways to enhance the flavor of your dishes. To begin with, you can use it as a spread on your toast or mix it with your morning upma to give it a rich, nutty taste. Additionally, you can add a dollop of ghee to your rice, lentils, or curries for added depth of flavor. You can also use it for sautéing vegetables or as a ghee for deep-frying. Ghee is a popular ingredient in traditional Indian desserts such as gajar ka halwa or kheer, which are rice pudding-like dishes. You can also use ghee in religious rituals as it is considered to be pure and auspicious in Indian culture. You can offer it as holy food to deities or use for lighting lamps during prayer ceremonies.
Storage Instructions
When storing Indian ghee, it is important to transfer it to a clean, dry, and airtight container. You should use a container made of glass or stainless steel that has a tight-fitting lid. Furthermore, it is crucial to place the container in a cool and dry place away from direct sunlight and heat sources. This is because exposure to light and heat can cause the breakdown of ghee’s nutrients. To prevent contamination, avoid using plastic containers as ghee can react with plastic. It is best to consume ghee within a month of making it for maximum freshness and flavor. Additionally, you can store ghee at room temperature for up to 3 months or in the refrigerator for up to 6 months. When scooping out ghee, always use a clean and dry spoon to prevent any contamination.
FAQs
What is Indian ghee?
Indian ghee, also known as clarified butter, is a staple ingredient in Indian households. It is made by separating the milk protein and caramelized milk solids from the butterfat, leaving behind a pure, golden liquid with a rich, nutty flavor.
What is the best ghee to use?
The best ghee is made from good quality, store-bought butter or homemade butter using raw milk or cultured cream. Kerry Gold and other high-quality brands of butter work well for making ghee.
How do I make homemade ghee?
To make homemade ghee, melt sticks of butter over medium-high heat until it comes to a boil. Reduce the heat to the lowest setting and let the butter simmer for a long time until the milk solids caramelize and sink to the bottom of the pot. Strain the clear liquid into a mason jar and let it cool.
What are the benefits of ghee?
Ghee has been used in Ayurvedic medicine for centuries and is believed to have numerous health benefits, including boosting digestion, improving skin health, and enhancing brain function. It also has a higher smoke point than butter and other oils, making it a healthier option for high-heat cooking.
How do I store ghee?
Store ghee in a clean, dry, and airtight container made of glass or stainless steel with a tight-fitting lid. Keep it in a cool and dry place away from direct sunlight and heat sources.
How do I know when the ghee is done?
Ghee is done when the white foam on top disappears, and the milk solids turn golden brown and sink to the bottom of the pot. Visual cues, like the color and aroma, can help you gauge when it’s ready. You can also use an external timer to ensure the perfect ghee.
Can I use olive oil instead of ghee?
While olive oil has a similar fat content to ghee, it does not have the same flavor and may not work well in traditional Indian recipes. Ghee has a unique nutty flavor that enhances the taste of the dish.
What is brown butter, and how is it different from ghee?
You can make brown butter by cooking butter over medium heat until the milk solids caramelize and give the butter a nutty, toasted flavor. Ghee, on the other hand, is made by clarifying butter to remove the milk solids and has a pure, golden color and nutty flavor.
How do I make sure I get enough ghee in my diet?
Include ghee in your daily diet by using it to cook vegetables, lentils, or meats. You can also spread it on toast or use it to make popcorn for a delicious and healthy snack.
Can I use coconut oil instead of ghee?
While coconut oil has a similar consistency to ghee, it has a distinct flavor and may not work well in traditional Indian recipes. Ghee has a unique nutty flavor that enhances the taste of the dish.
What are the visual cues for making ghee?
The visual cues for making ghee include the disappearance of the white foam on top, the golden color of the milk solids, and the clear, golden liquid that remains.
How long does it take to make ghee?
Making ghee can take a long time, usually between 30 minutes to an hour. However, the total time depends on the quantity of butter and the heat.
Recipe
Indian Ghee Recipe: A Journey to the Heart of Indian Cooking
Indian ghee is a clarified butter with a rich, nutty flavor and high smoke point, perfect for cooking and adding depth to dishes.
- Prep
- 40min
- Cook
- 40min
- Servings
- 10servings
- Calories
- 300kcal
Ingredients
- 10 liters Non-homogenized milk
- 1/2 tsp Curd or fresh yogurt
Instructions
- 1 To start with, boil 1 liter of milk in a saucepan and let it cool. Once it cools, the thick cream will form on top of the milk.
- 2 Next, transfer the warm milk with cream to a bowl and add 1/2 tsp yogurt/curd. Mix well and cover the bowl.
- 3 Then, keep the bowl in a warm place for 5-6 hours, allowing the milk to ferment and curdle. This will create a thick layer of cream.
- 4 After that, collect the cream from the prepared curd in an airtight container and store it in the refrigerator. Keep inoculating, culturing, and collecting the cream for 10 days until you have a good amount.
- 5 Once you have collected enough cream, transfer it into a mixi jar or blender along with 1 cup of water. Blend the cream in 2 batches with 1 cup water, blend for a minute or until butter separated from the buttermilk. You can add more water if needed.
- 6 After blending, transfer the butter and buttermilk into a large bowl. Gather all the butter by moving it to one side using a spatula or your hand. You will get a large size butter.
- 7 Next, shape the butter and keep it in the fridge to set for 30 minutes. After 30 minutes, slice the unsalted white butter.
- 8 To prepare the ghee, add the butter to a heavy-bottomed pan and keep the flame on low heat. Melt the butter completely.
- 9 Then, continue boiling the melted butter for several minutes until the ghee turns golden and the bubbles turn transparent.
- 10 Once done, turn off the flame and let it slightly cool. Finally, filter out the ghee using a fine-mesh strainer and store it in a clean glass jar.
- 11 Finally, your homemade ghee, along with the buttermilk and unsalted white butter, are now ready to enjoy!